Articles
1927 Martin 000-18 restoration 

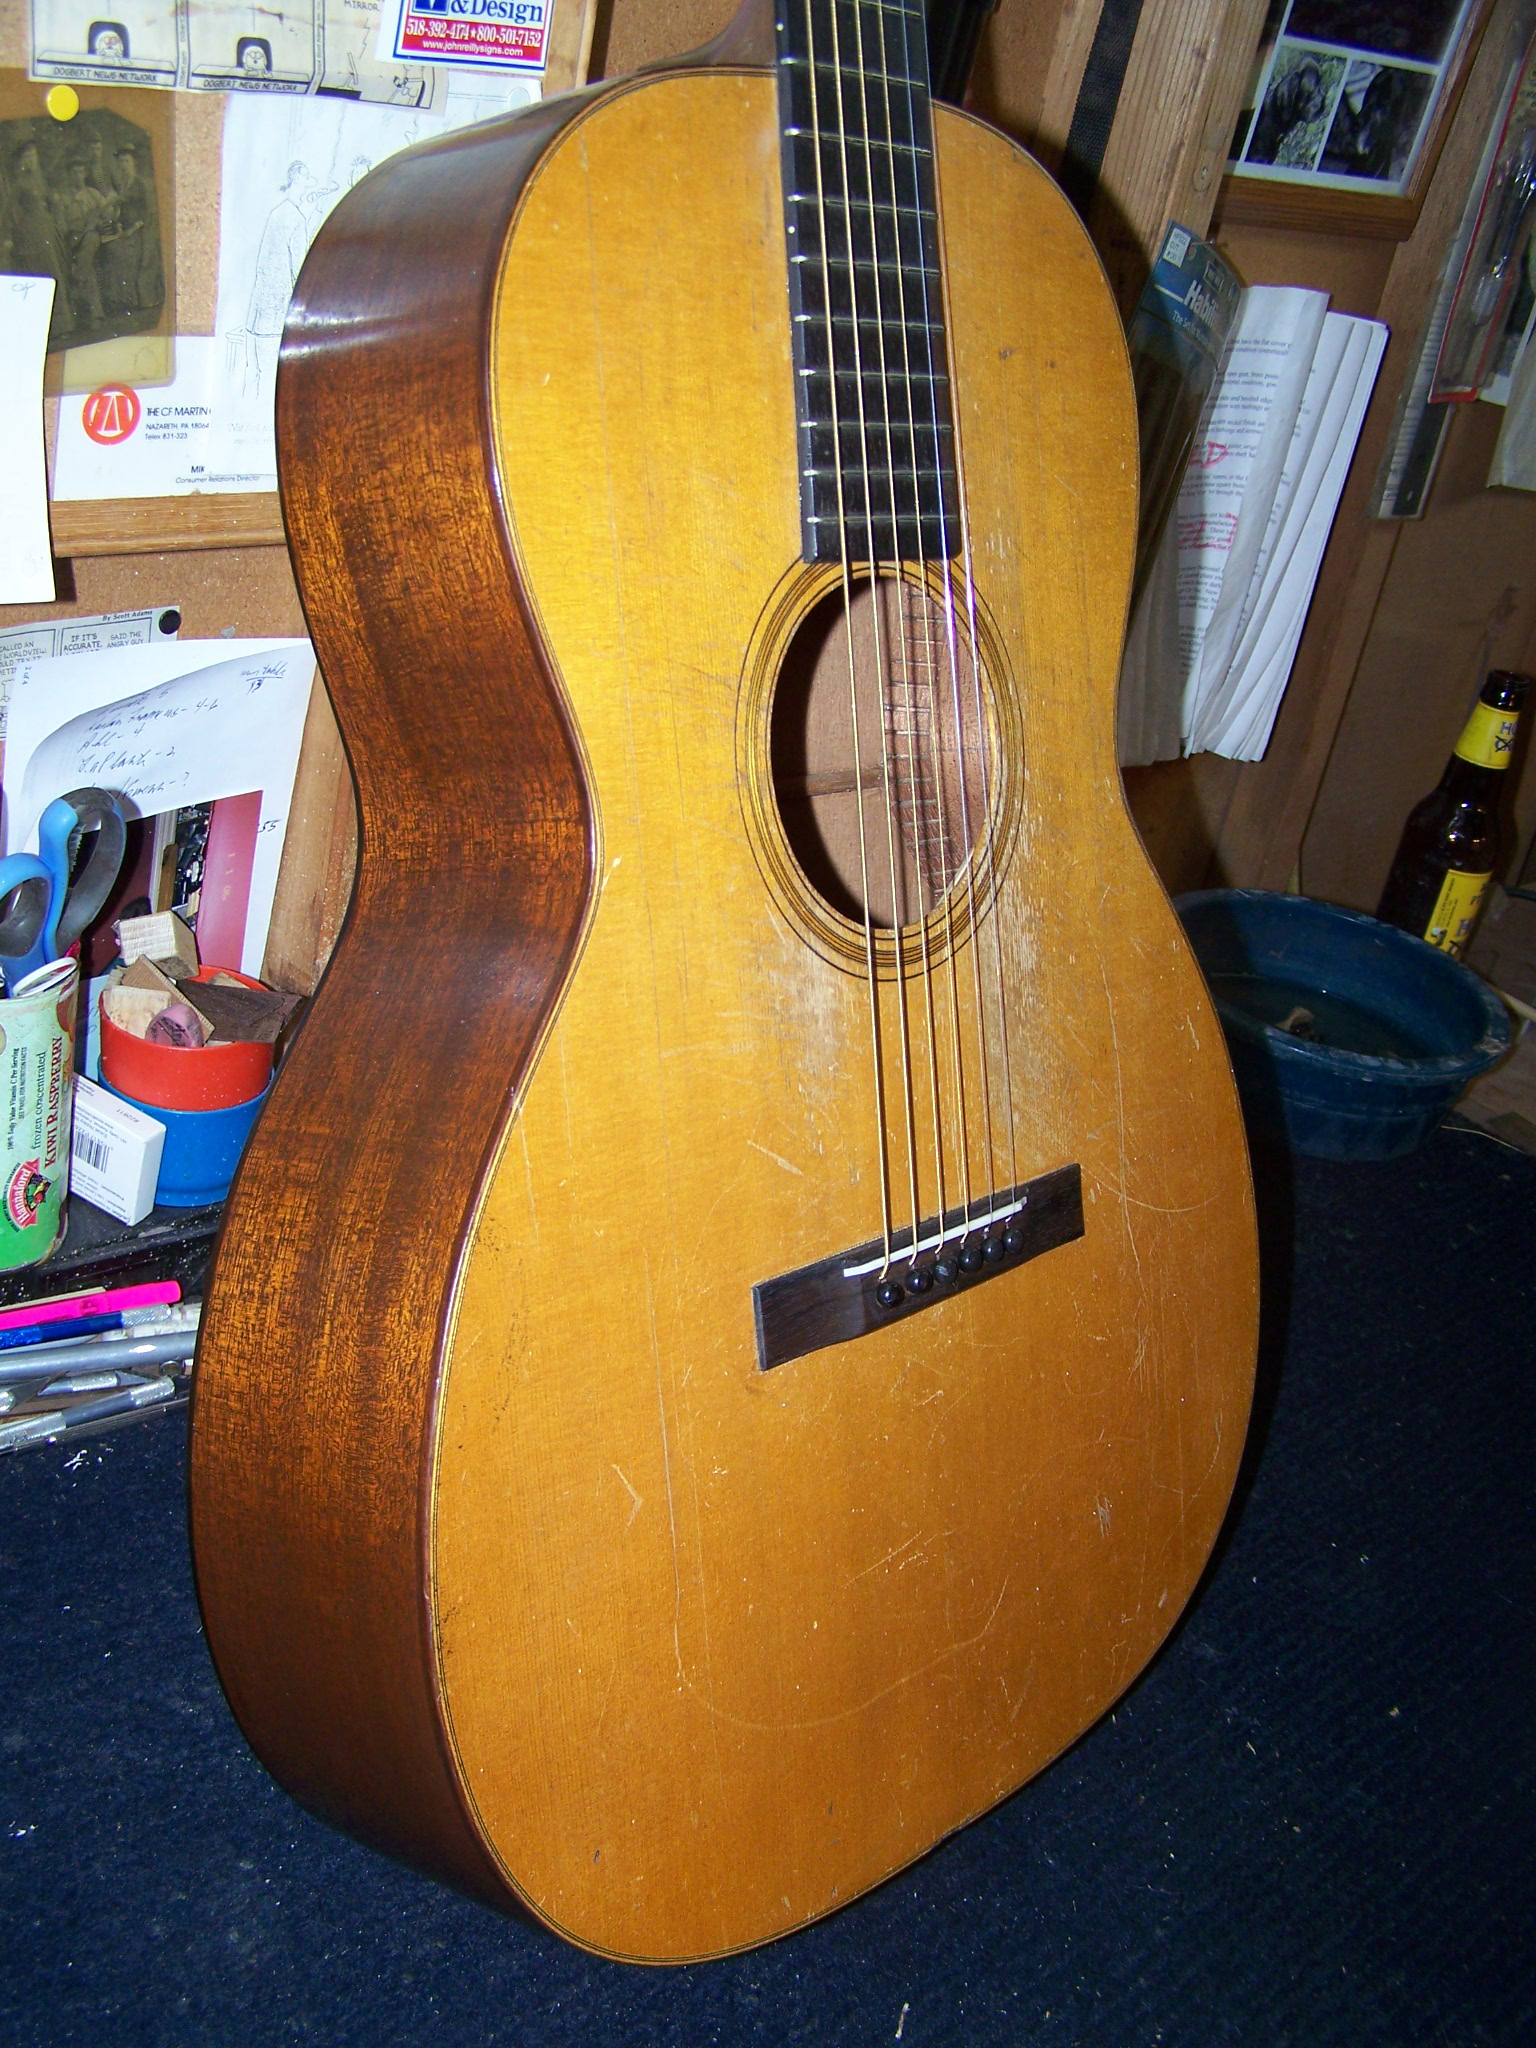
This guitar arrived in the shop via Lark Street Music in Teaneck NJ. Buzz had taken the guitar in for a customer and asked me to do the restoration. The guitar’s top, back and neck were largely intact but the sides were completely smashed, too far gone to rebuild.
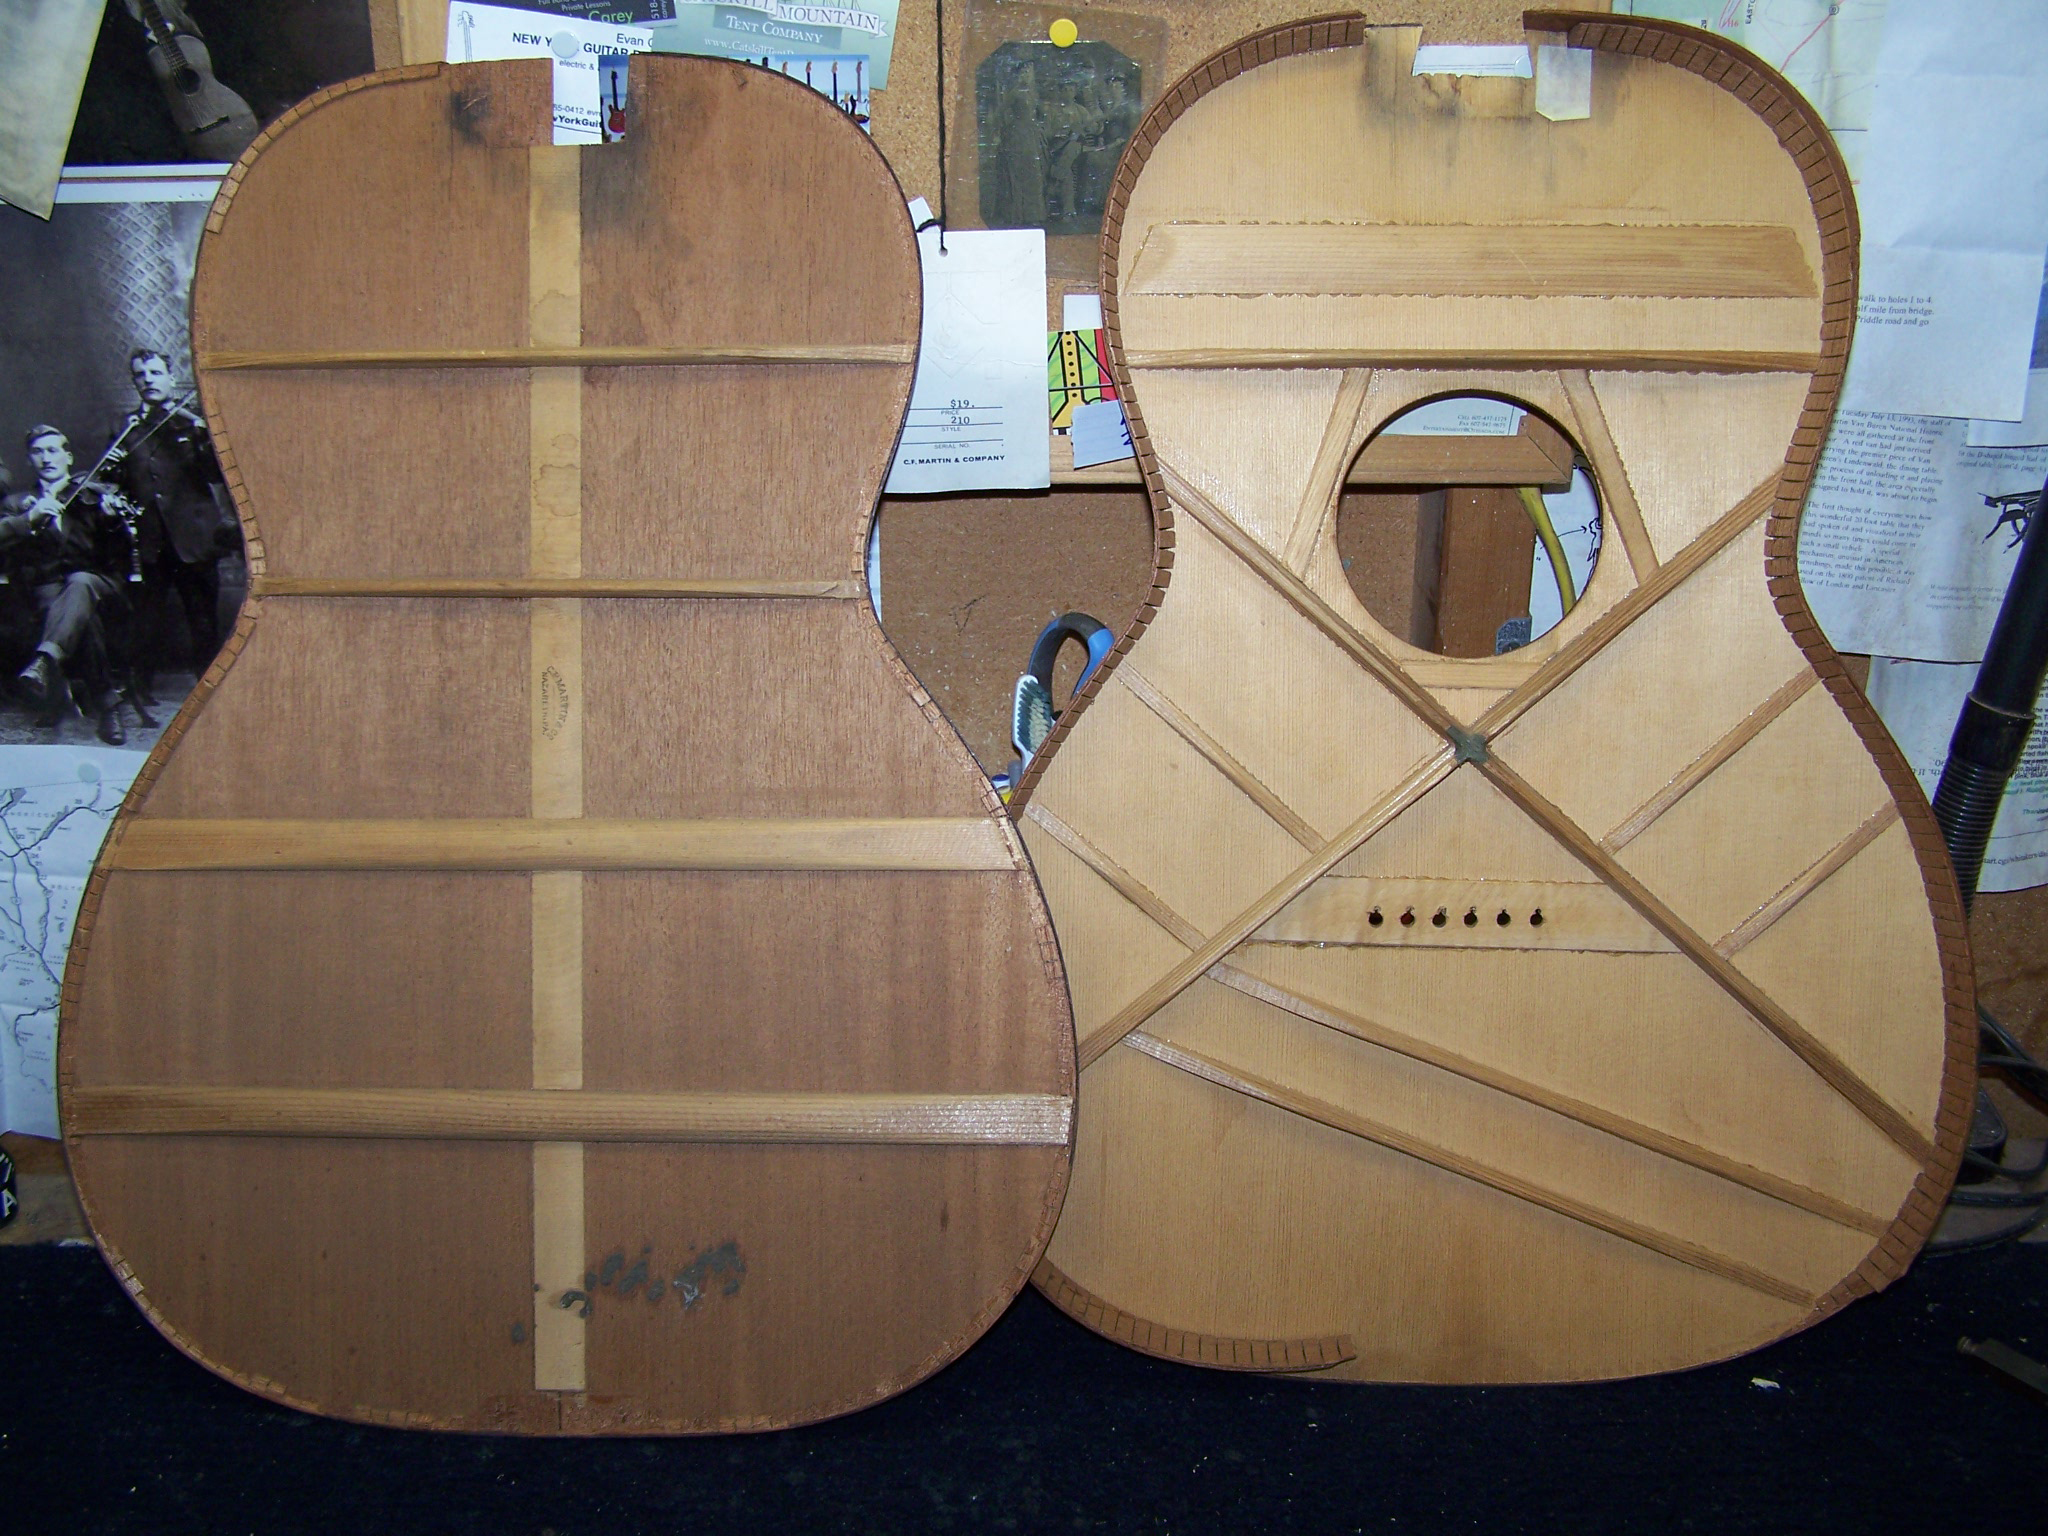 In addition, the guitar had been left under tension for some time after the body lost all rigidity due to the busted sides, so the top had dished significantly (braces and all). So the task here was to re-build the guitar with new sides, but also to flatten the top so that proper geometry could be achieved on the finished guitar.
Typically when a guitar is built (most steel string guitars anyway) the rim is assembled (bent sides glued to blocks, kerfing installed) and then the back and top are glued to  the rim. However, this is far more tricky to do if the top and back are already cut to the exact profile of the finished guitar. One way to do this would be to make a form that conforms exactly to the profile of the top and back. But rather than taking that approach I decided to build the guitar using the top as my platform for the sides, then attach the back, much in the way many classical builders assemble a guitar. I decided on that approach because most of the kerfed lining was still attached to the top.
The first operation was to bend new sides to the profiled of the top. I bent the sides by hand, which is generally my practice in my building. The mahogany that I chose for the project was a very old side set that I obtained many years ago from Mike Longworth. The wood is a good color and texture match for the original sides.
 The top had all of its original binding still attached, and almost all of the original kerfing with a good deal of mahogany from the sides still attached to the kerfing. To remove the remaining mahogany I worked all the way around the edge of the top with a sharp chisel, carefully shaving the bits of mahogany side still attached to the lining away from the lining and binding. The idea was to keep the kerfing and binding in place in order tothen glue the sides directly to the original lining and binding without disturbing either. I then laid the bent sides against the profile of the top to check the fit and touched up the bends where necessary to ensure a good fit with little deviation from the profile.
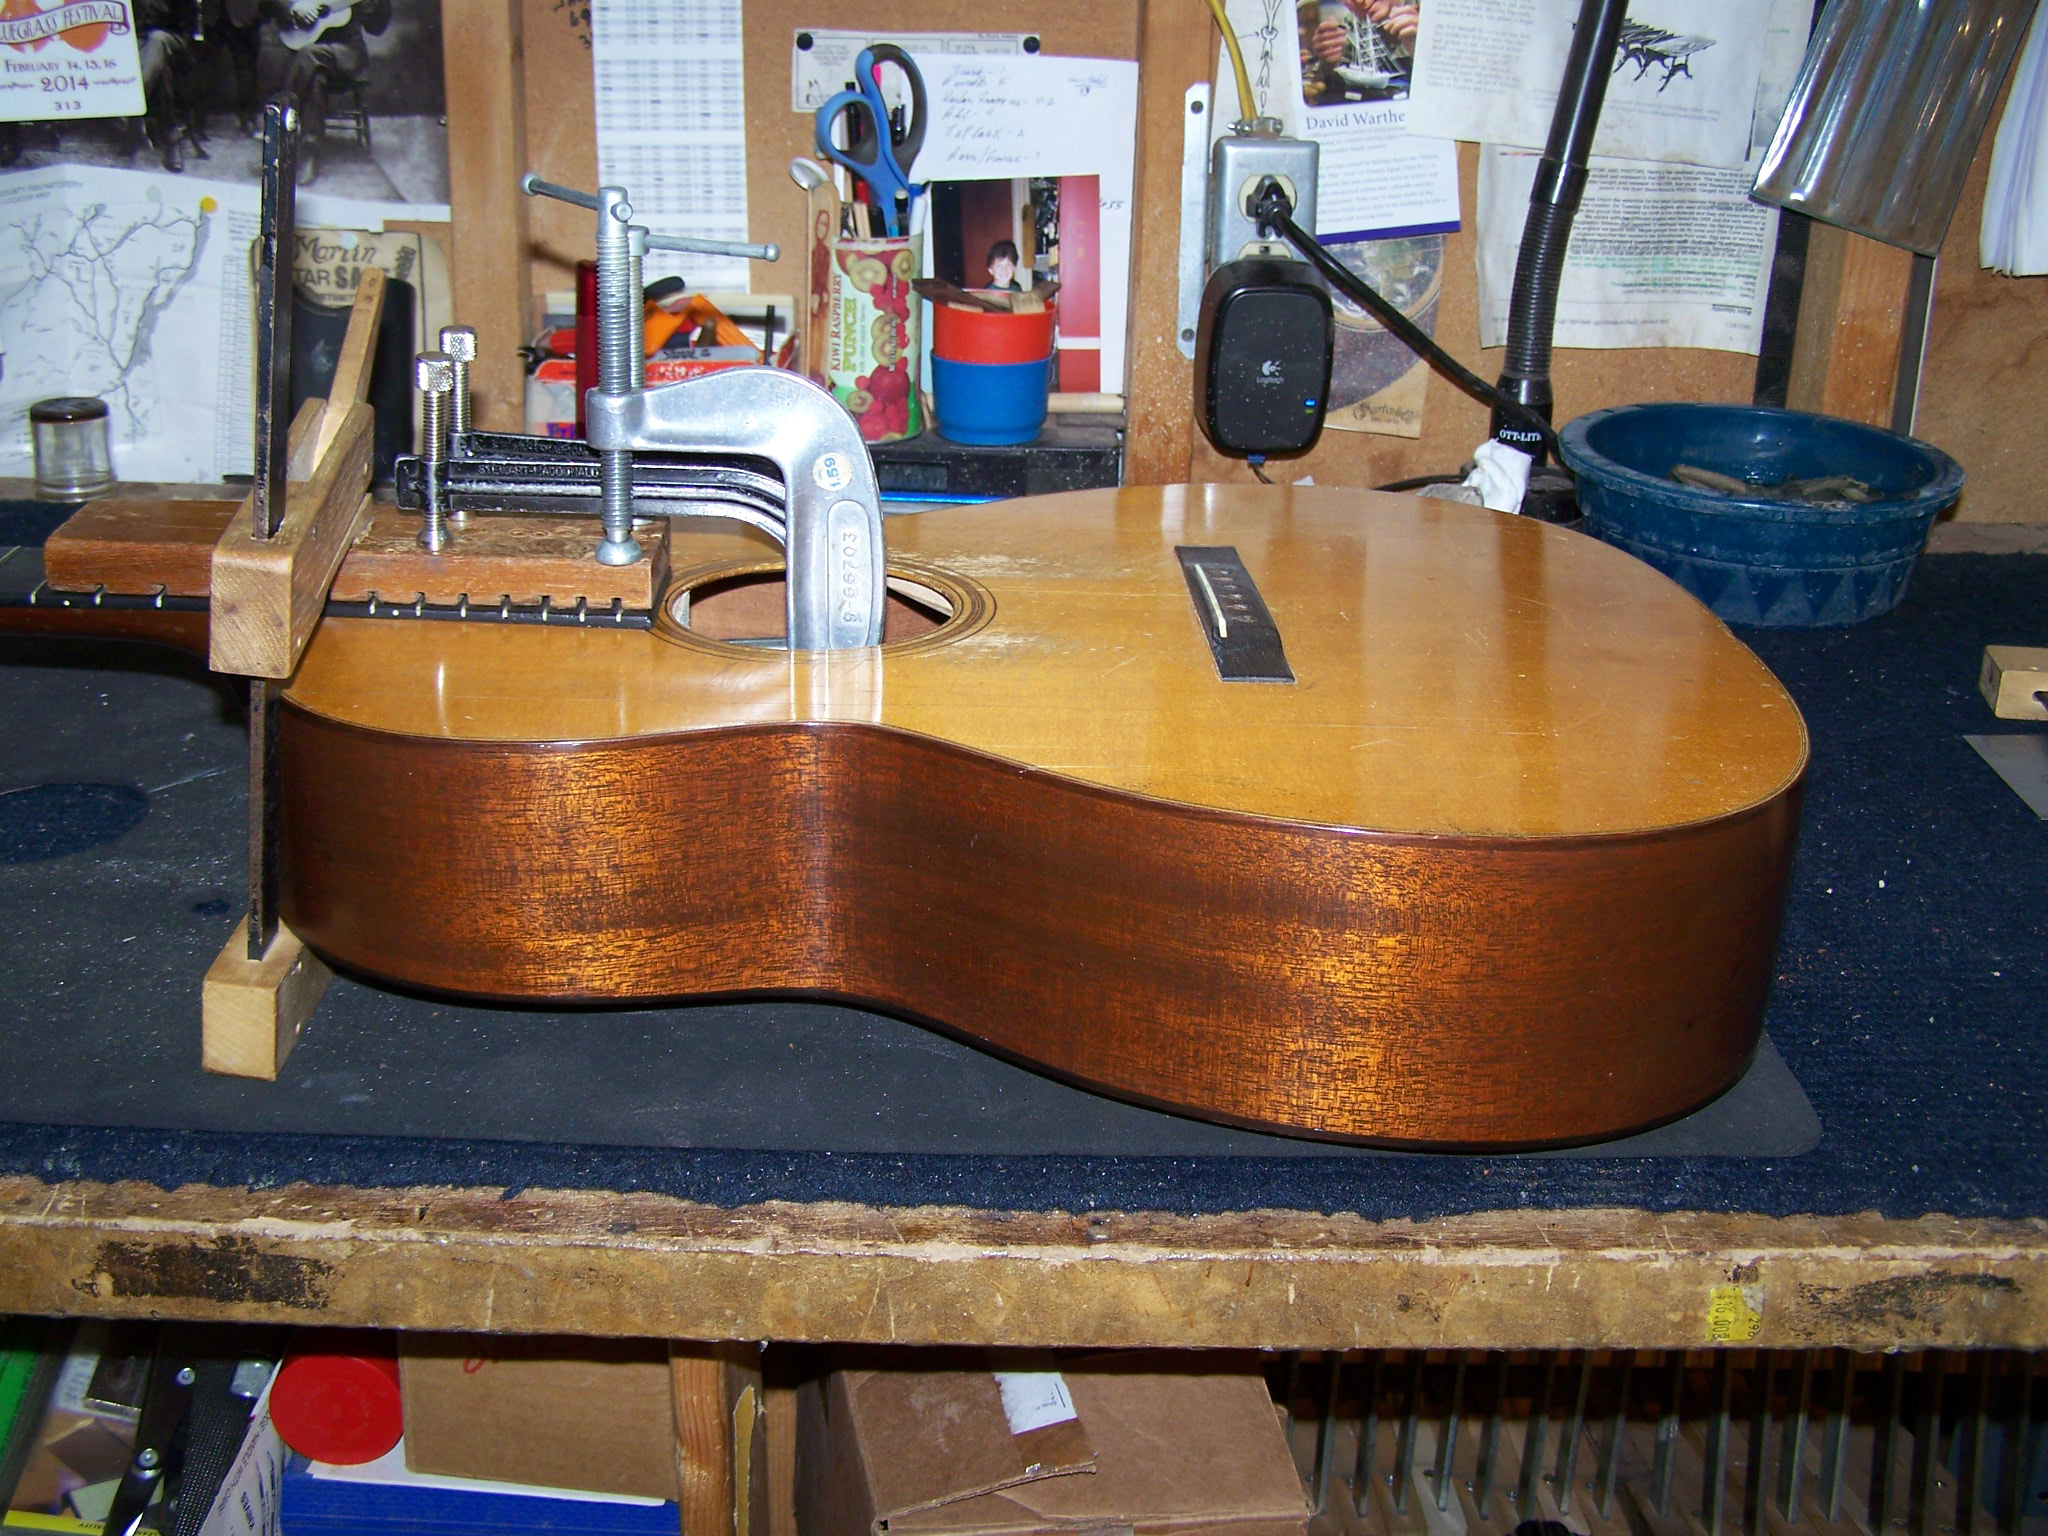
The next order of business was to flatten the top. Since the top had dished along both its length and its width, and the X bracing and upper transverse bar were both warped, I started out by removing these elements from the top, after which I clamped the top in a radius dish under a heat lamp for several weeks. The heat lamp would be on for 8-10 hours a day in the shop for that entire period, and when the top was removed from the dish weeks later the treatment had largely reversed the warpage, but not entirely. Installation of new X bracing and upper transverse bar completed the process of bringing the top back to its proper arch. Care was taken to make sure that the new bracing was the same height, width, profile and overall stiffness as the original bracing. The X braces were relieved to receive the finger braces, tone bars and bridge plate to match the original braces.
Next I glued the neck block and tail block in to place. The original blocks were undamaged (amazingly, given the condition of the sides) and the top had a nice and clear outline of each so placement was easy. After the blocks were in place and a few bits of missing kerfing installed it was time to install the first of the two sides. The sides 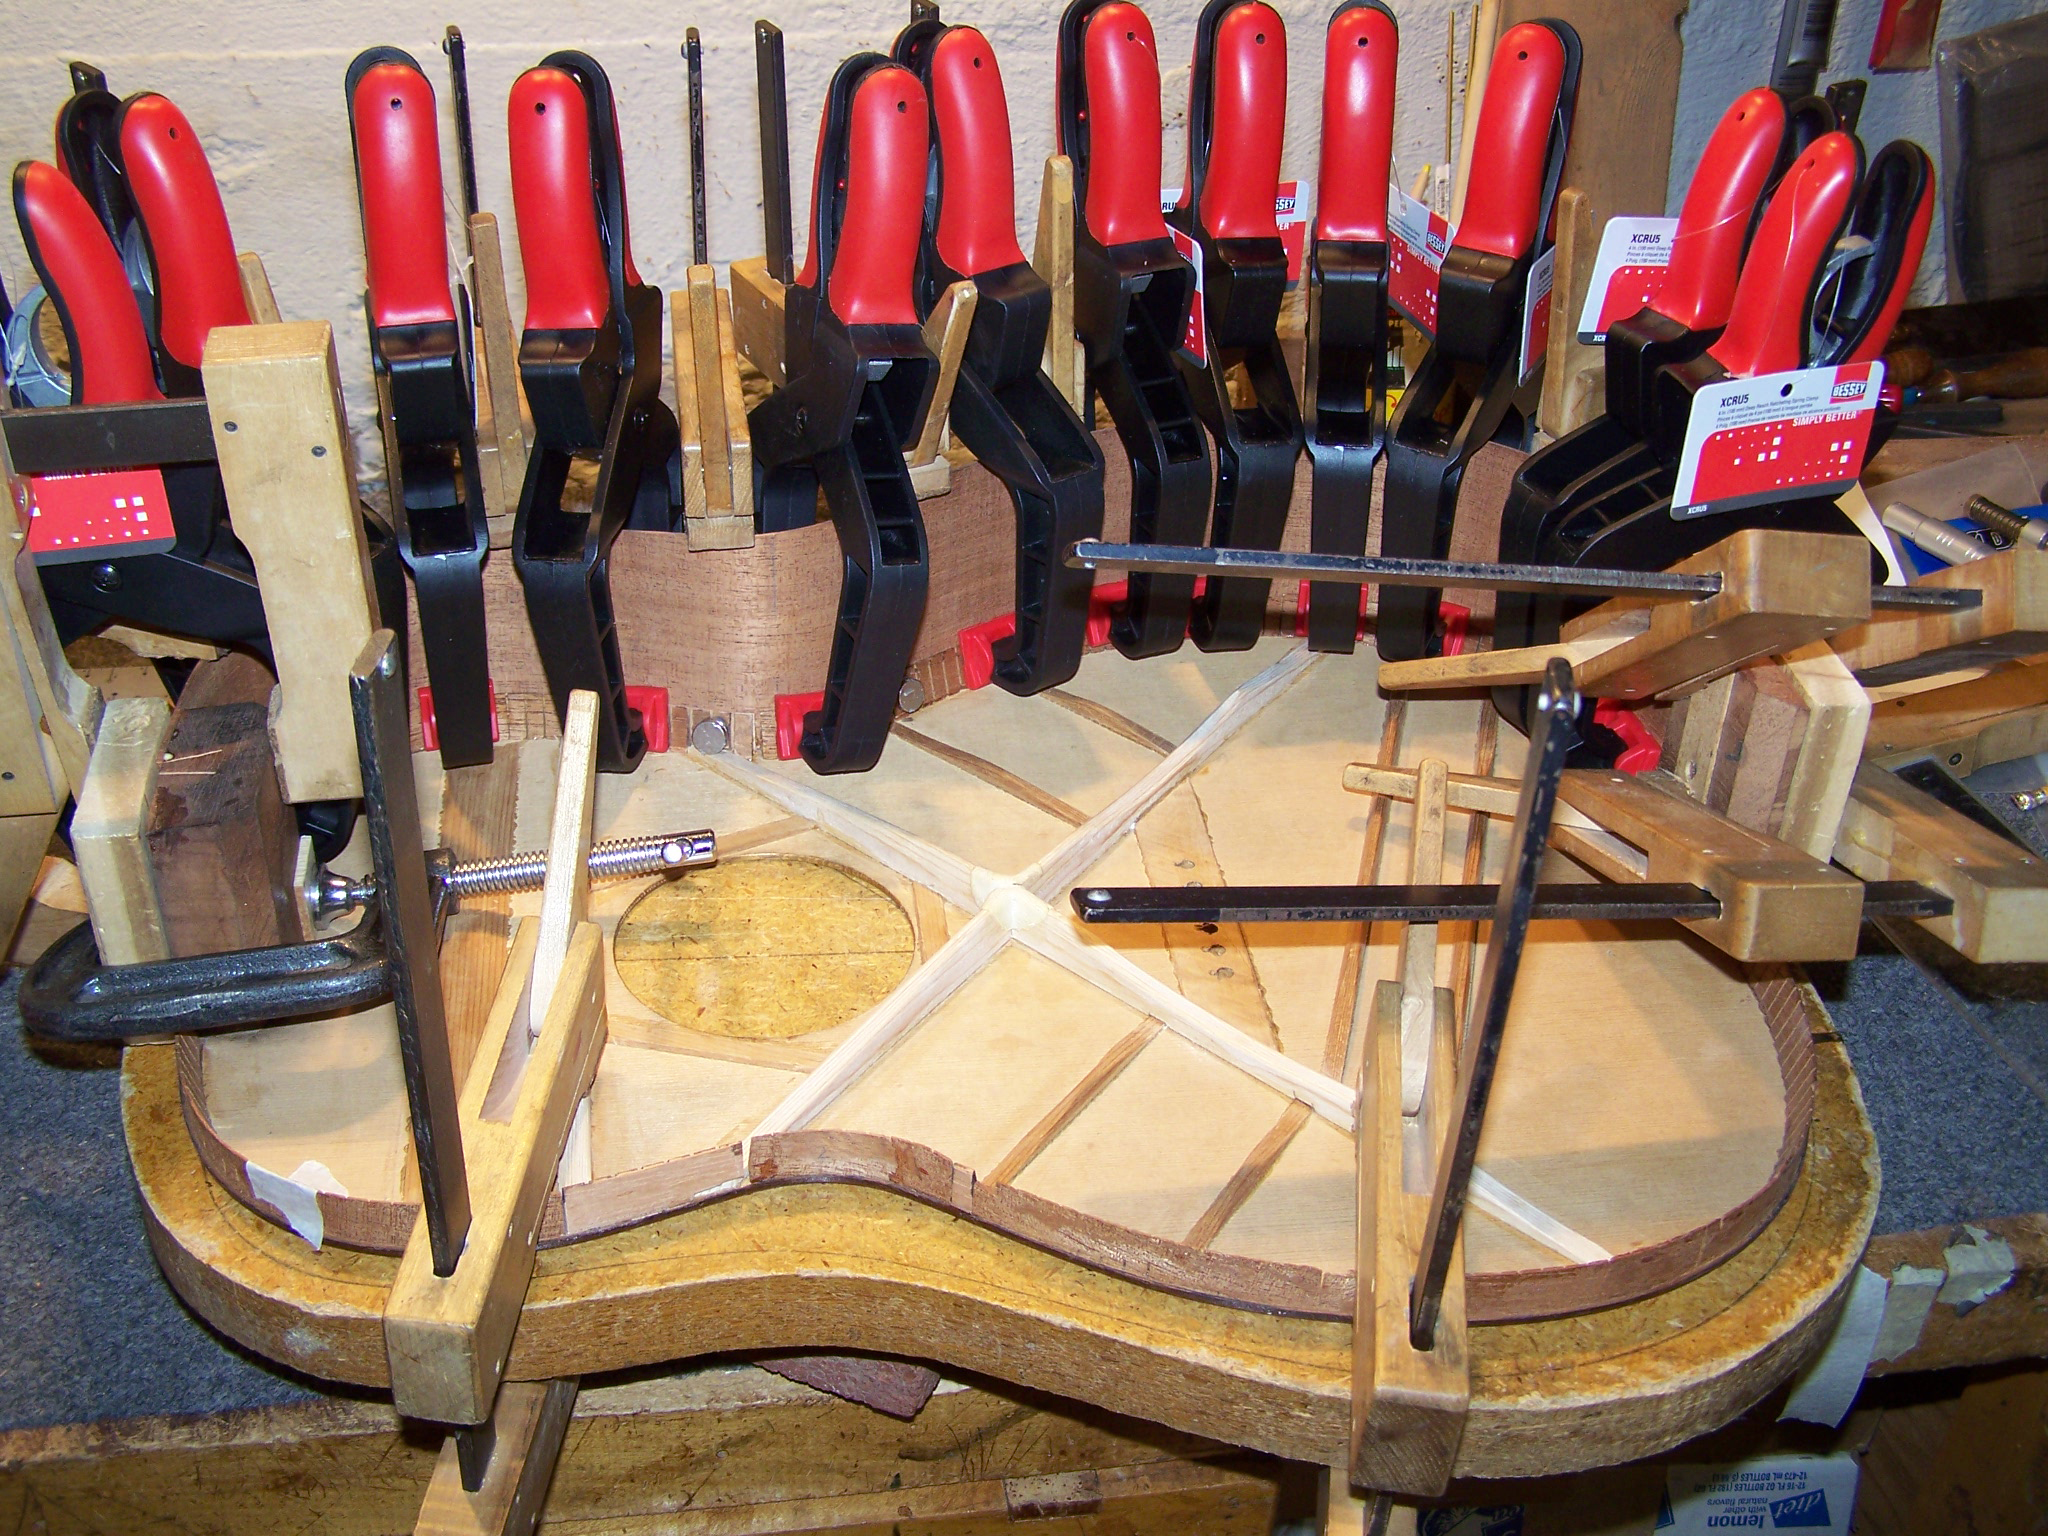 were dry clamped first and the joint checked all the way along to insure it was tight along the binding and also along the kerfing. There was a fair amount of adjustment
 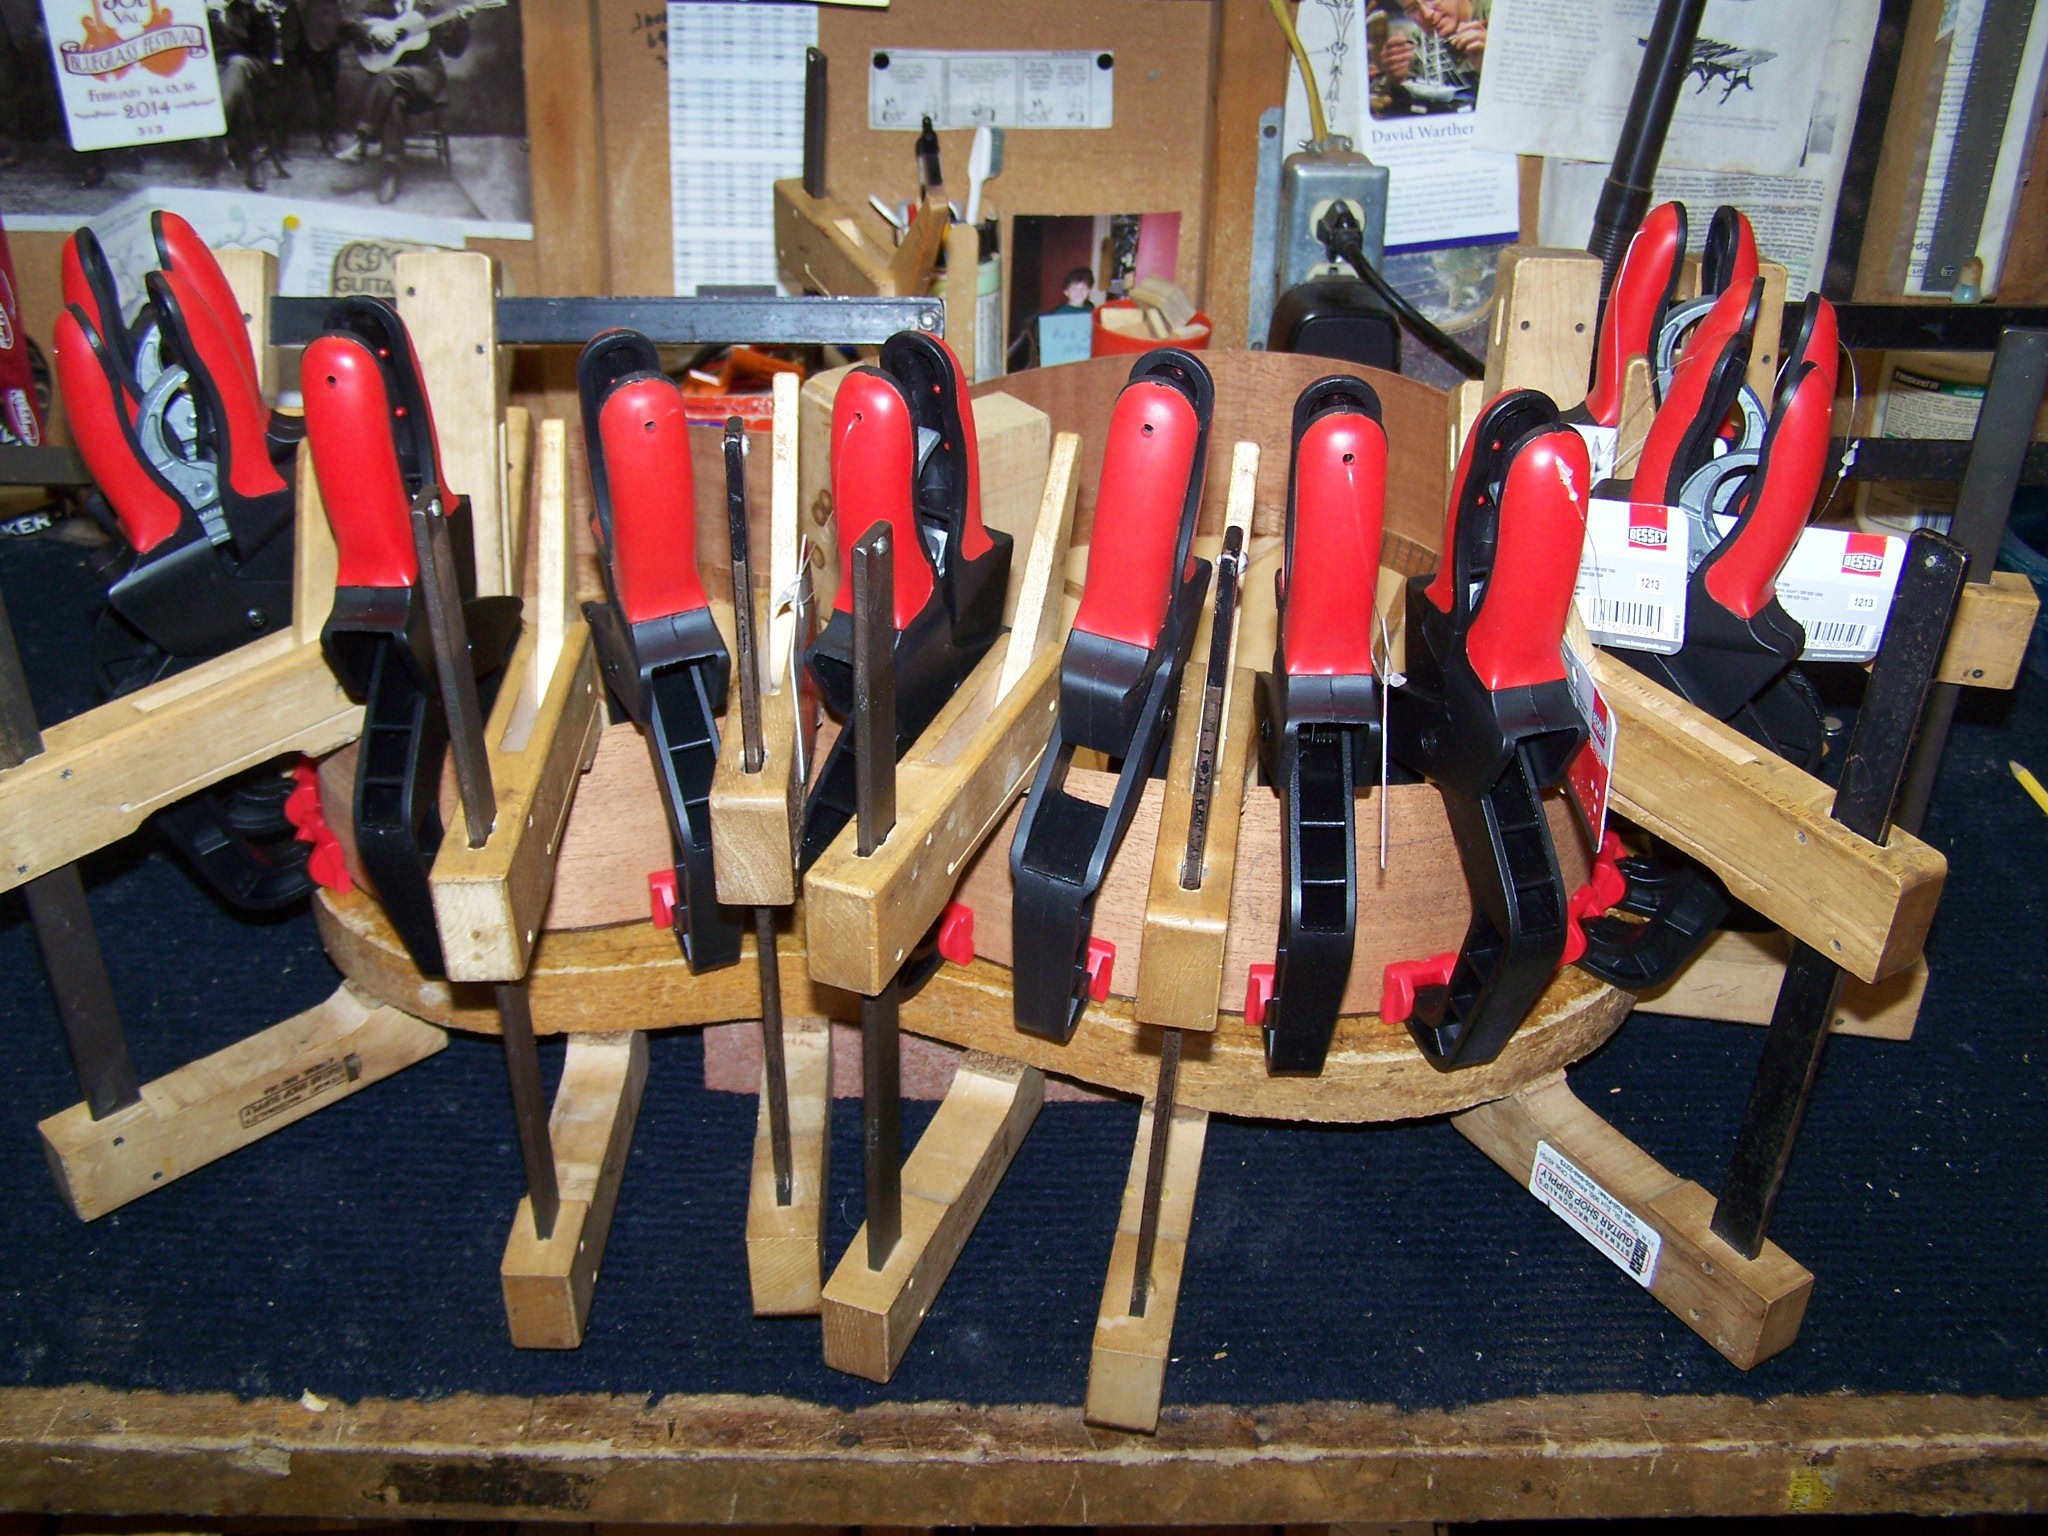 necessary to make sure that the fit was tight and necessary clamping pressurewould beminimal, as clamping was going to be a challenge because I was gluing to the kerfingand to thebinding/top in one operation. I clamped dry several times before finally marking the sides to length and trimming them.
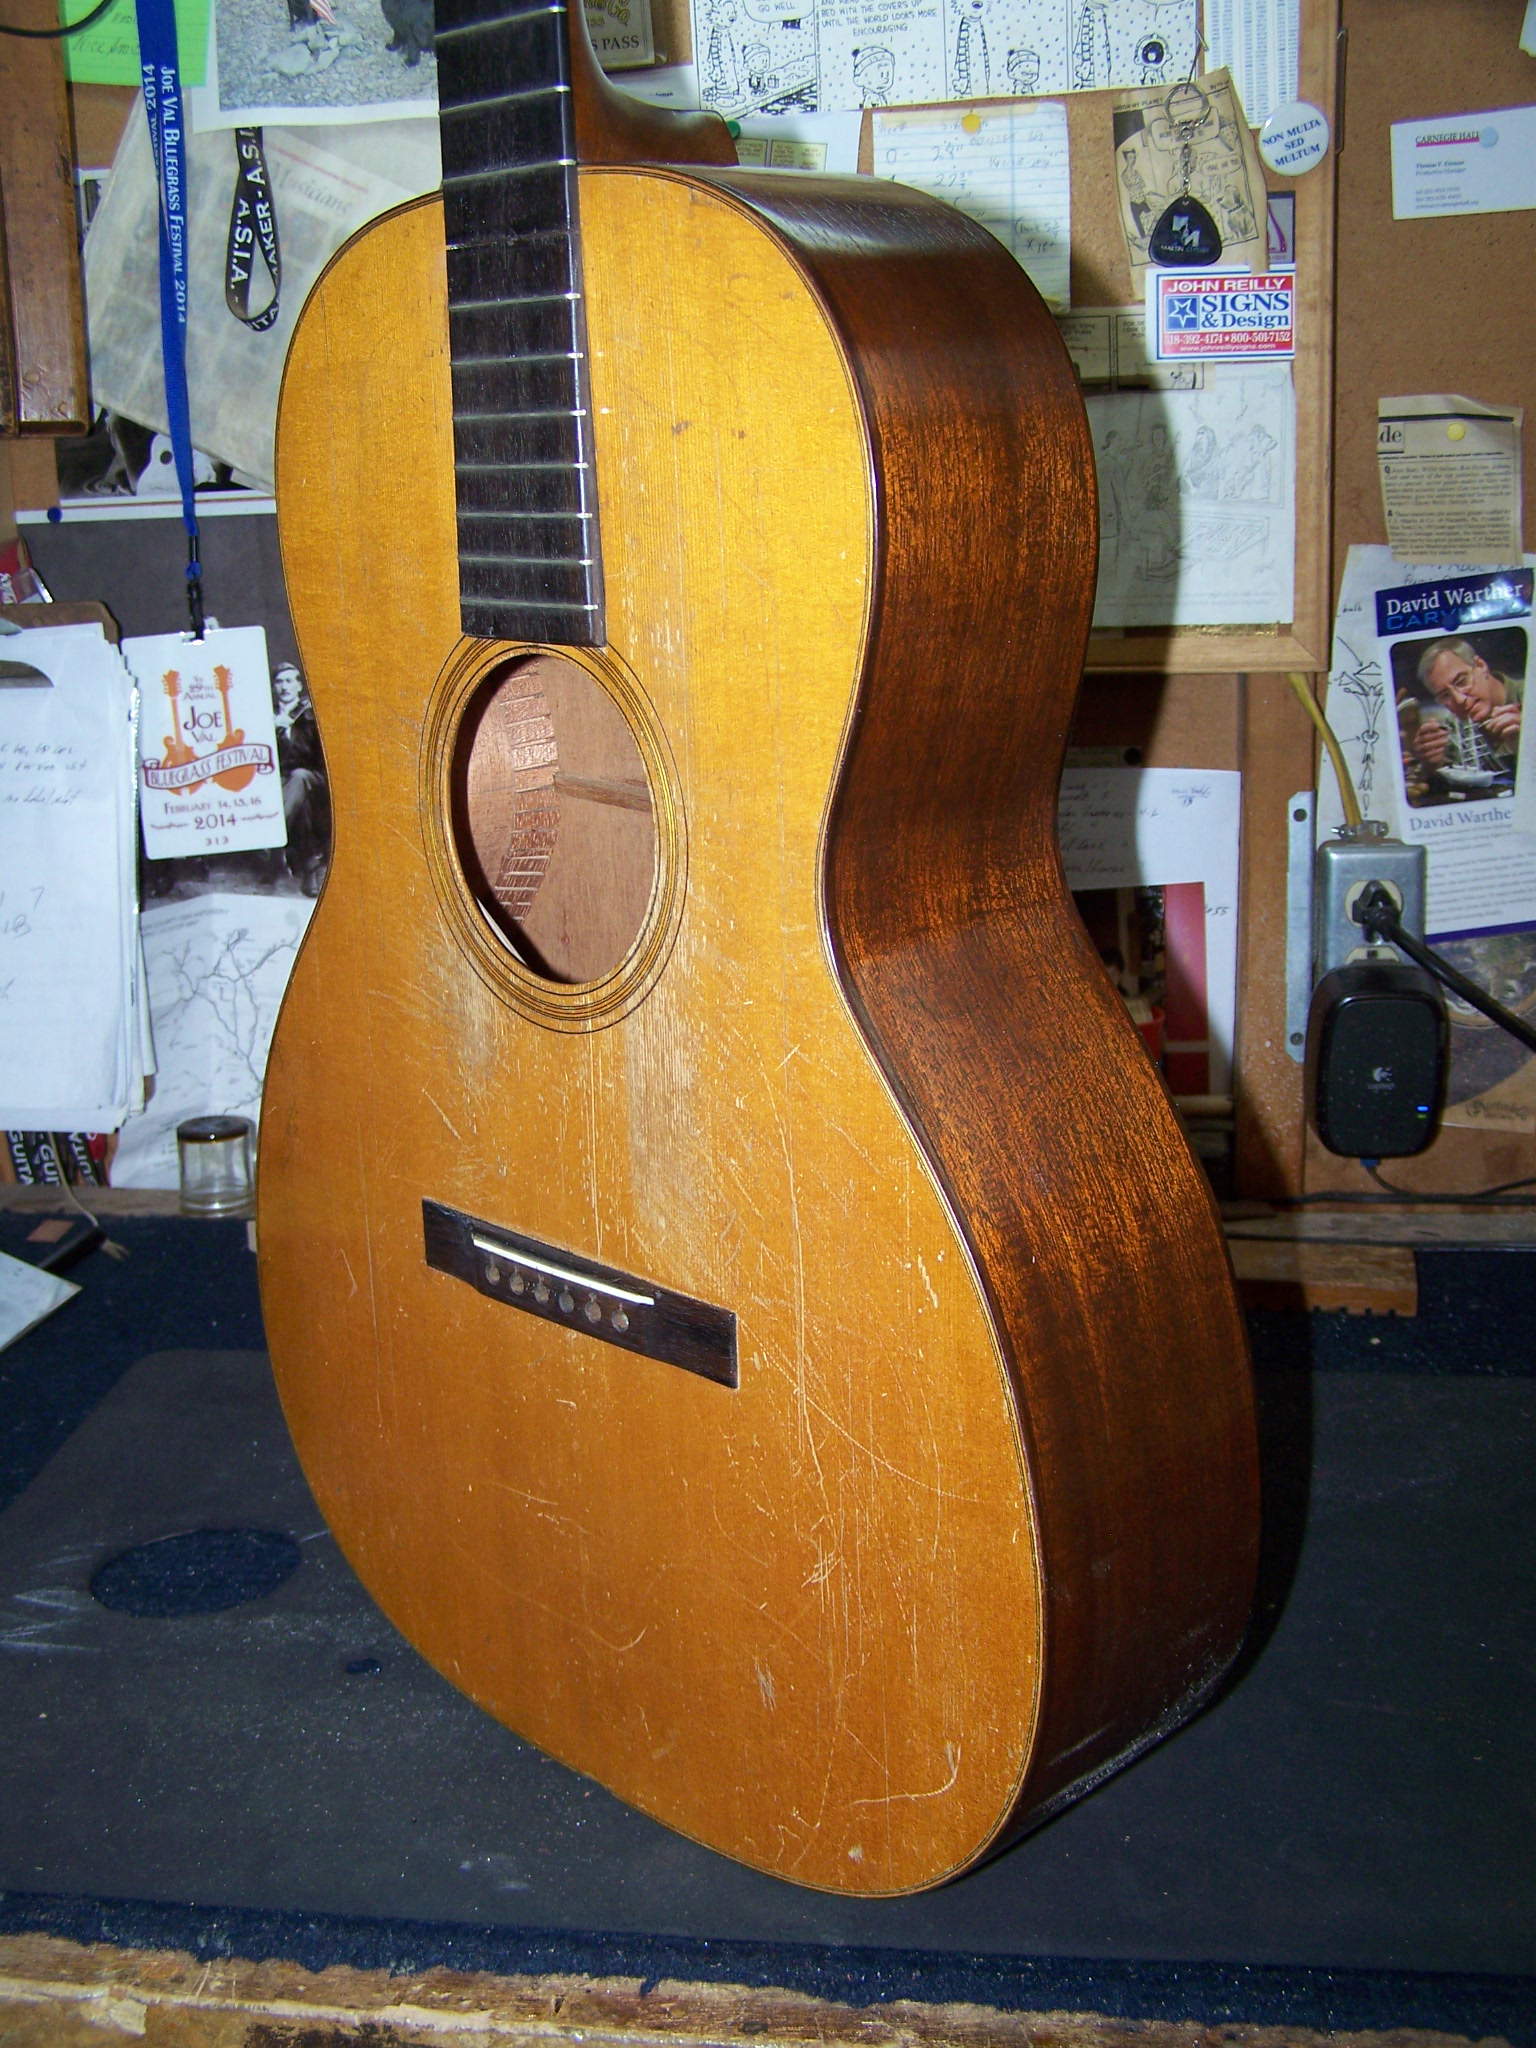
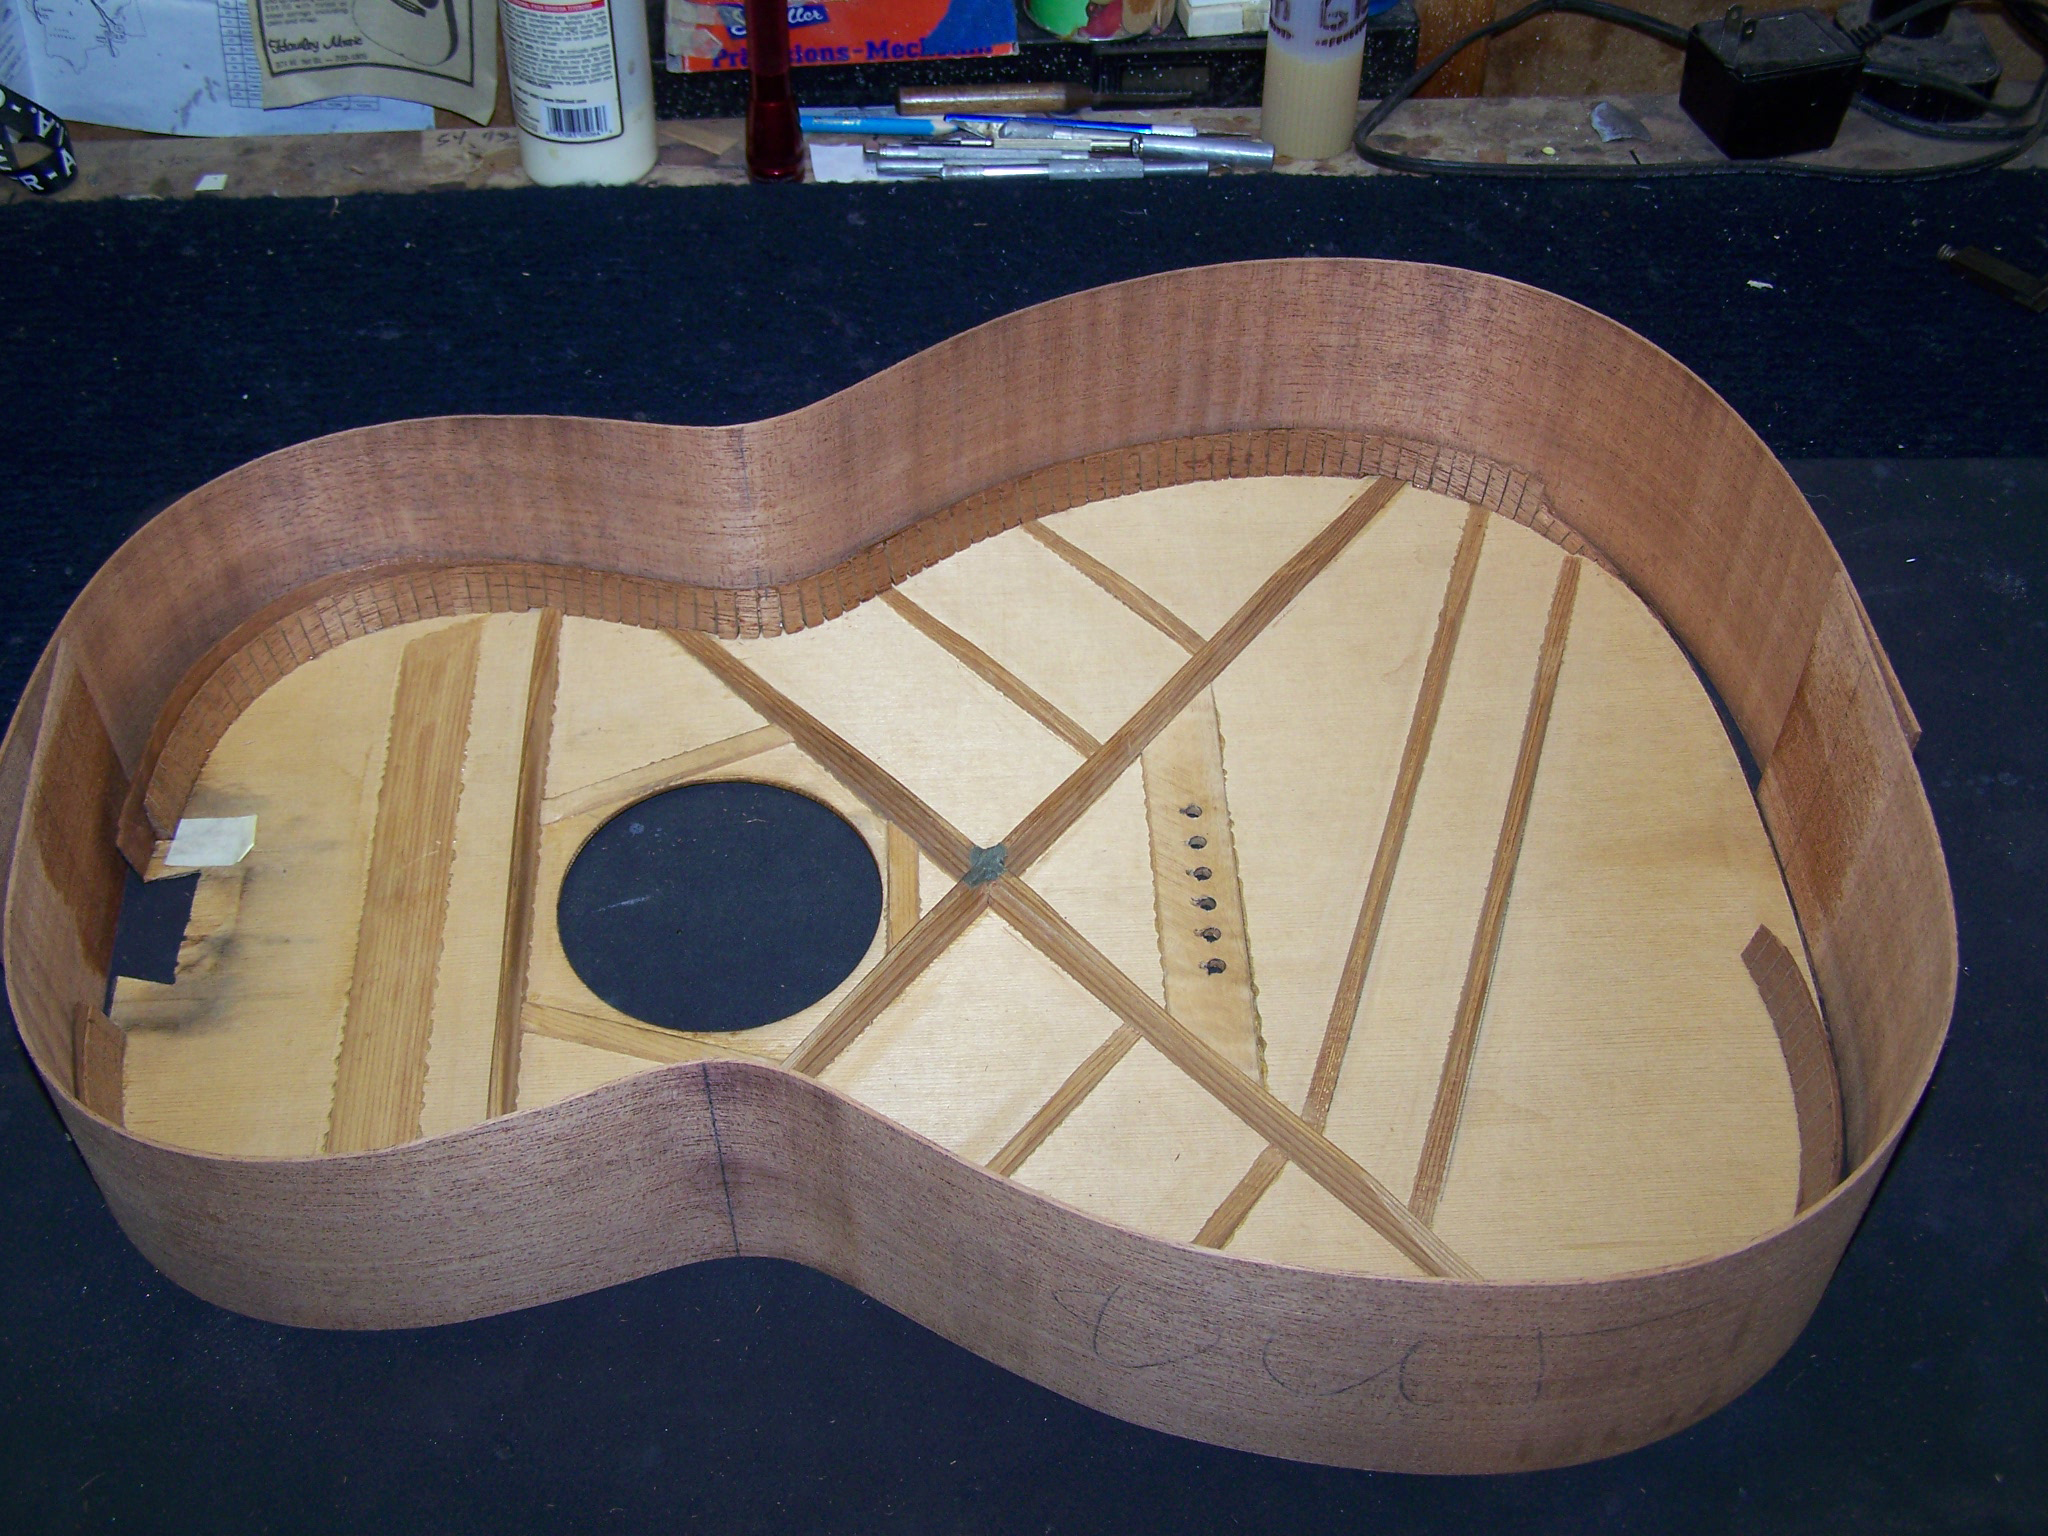
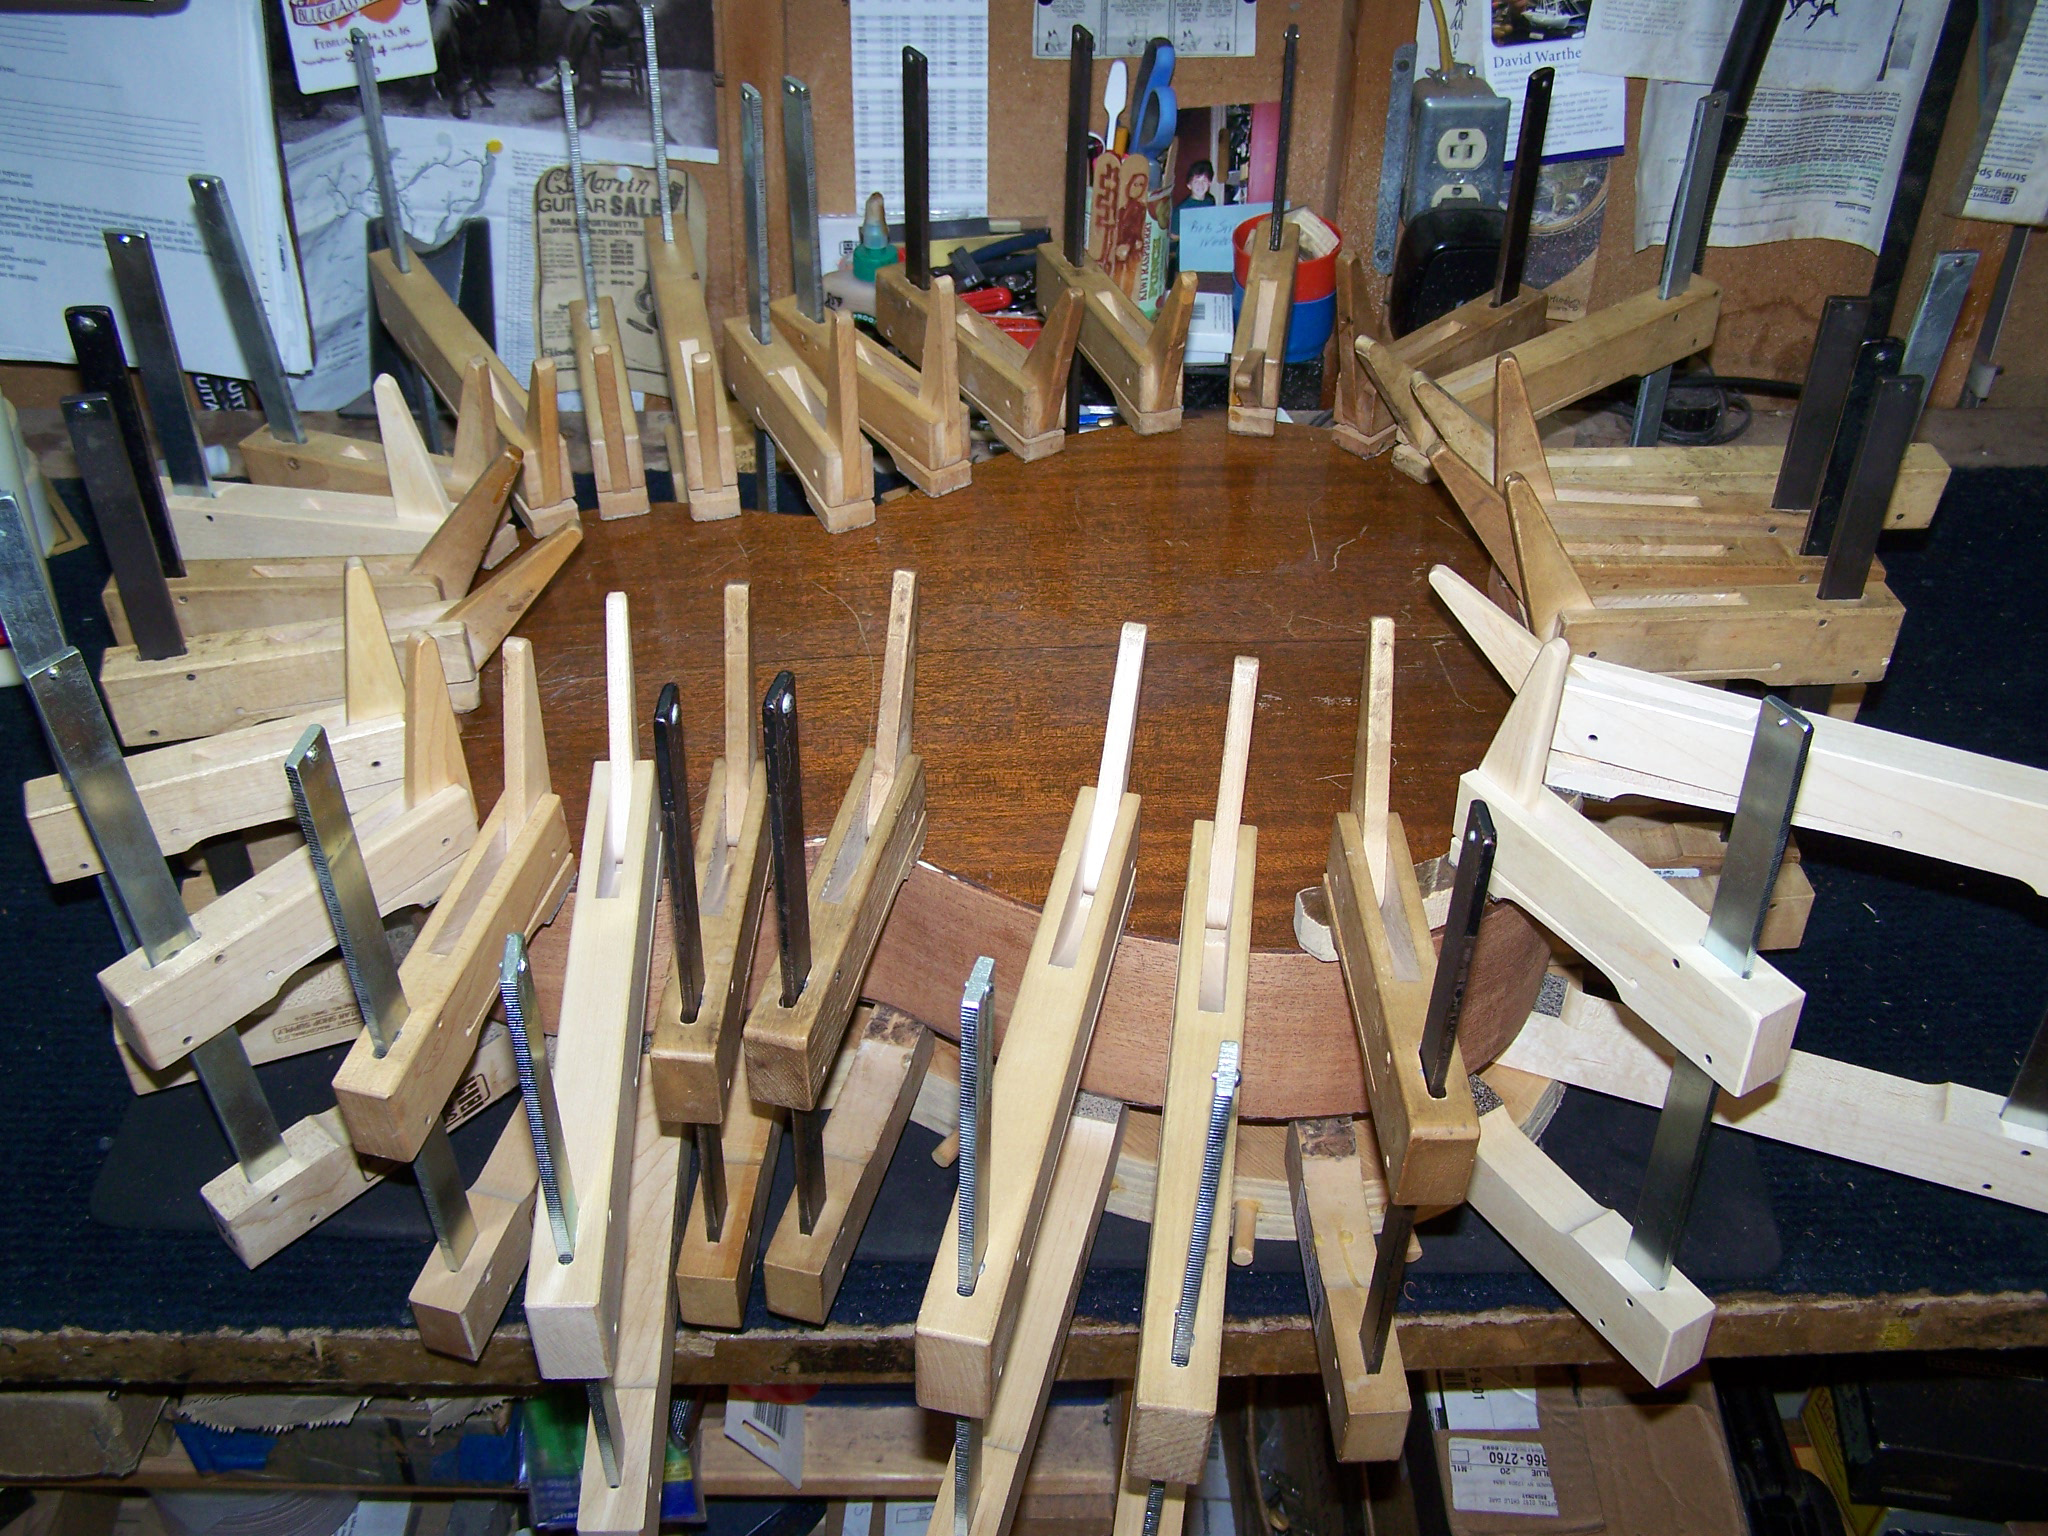
The gluing operation used medium sized quick grip clamps with trigger release that I bought at a localhardware outlet to apply pressure to the joint between the sides and the kerfing, and used cam clamps to apply pressure straight down on the sides to the binding/top. I alternatedthese two different clamps all around the body, gluing one side first, then the other. I used fishglue for this part of the operation as opposed to the hide glue used on the rest of the job because of the amount of time required to get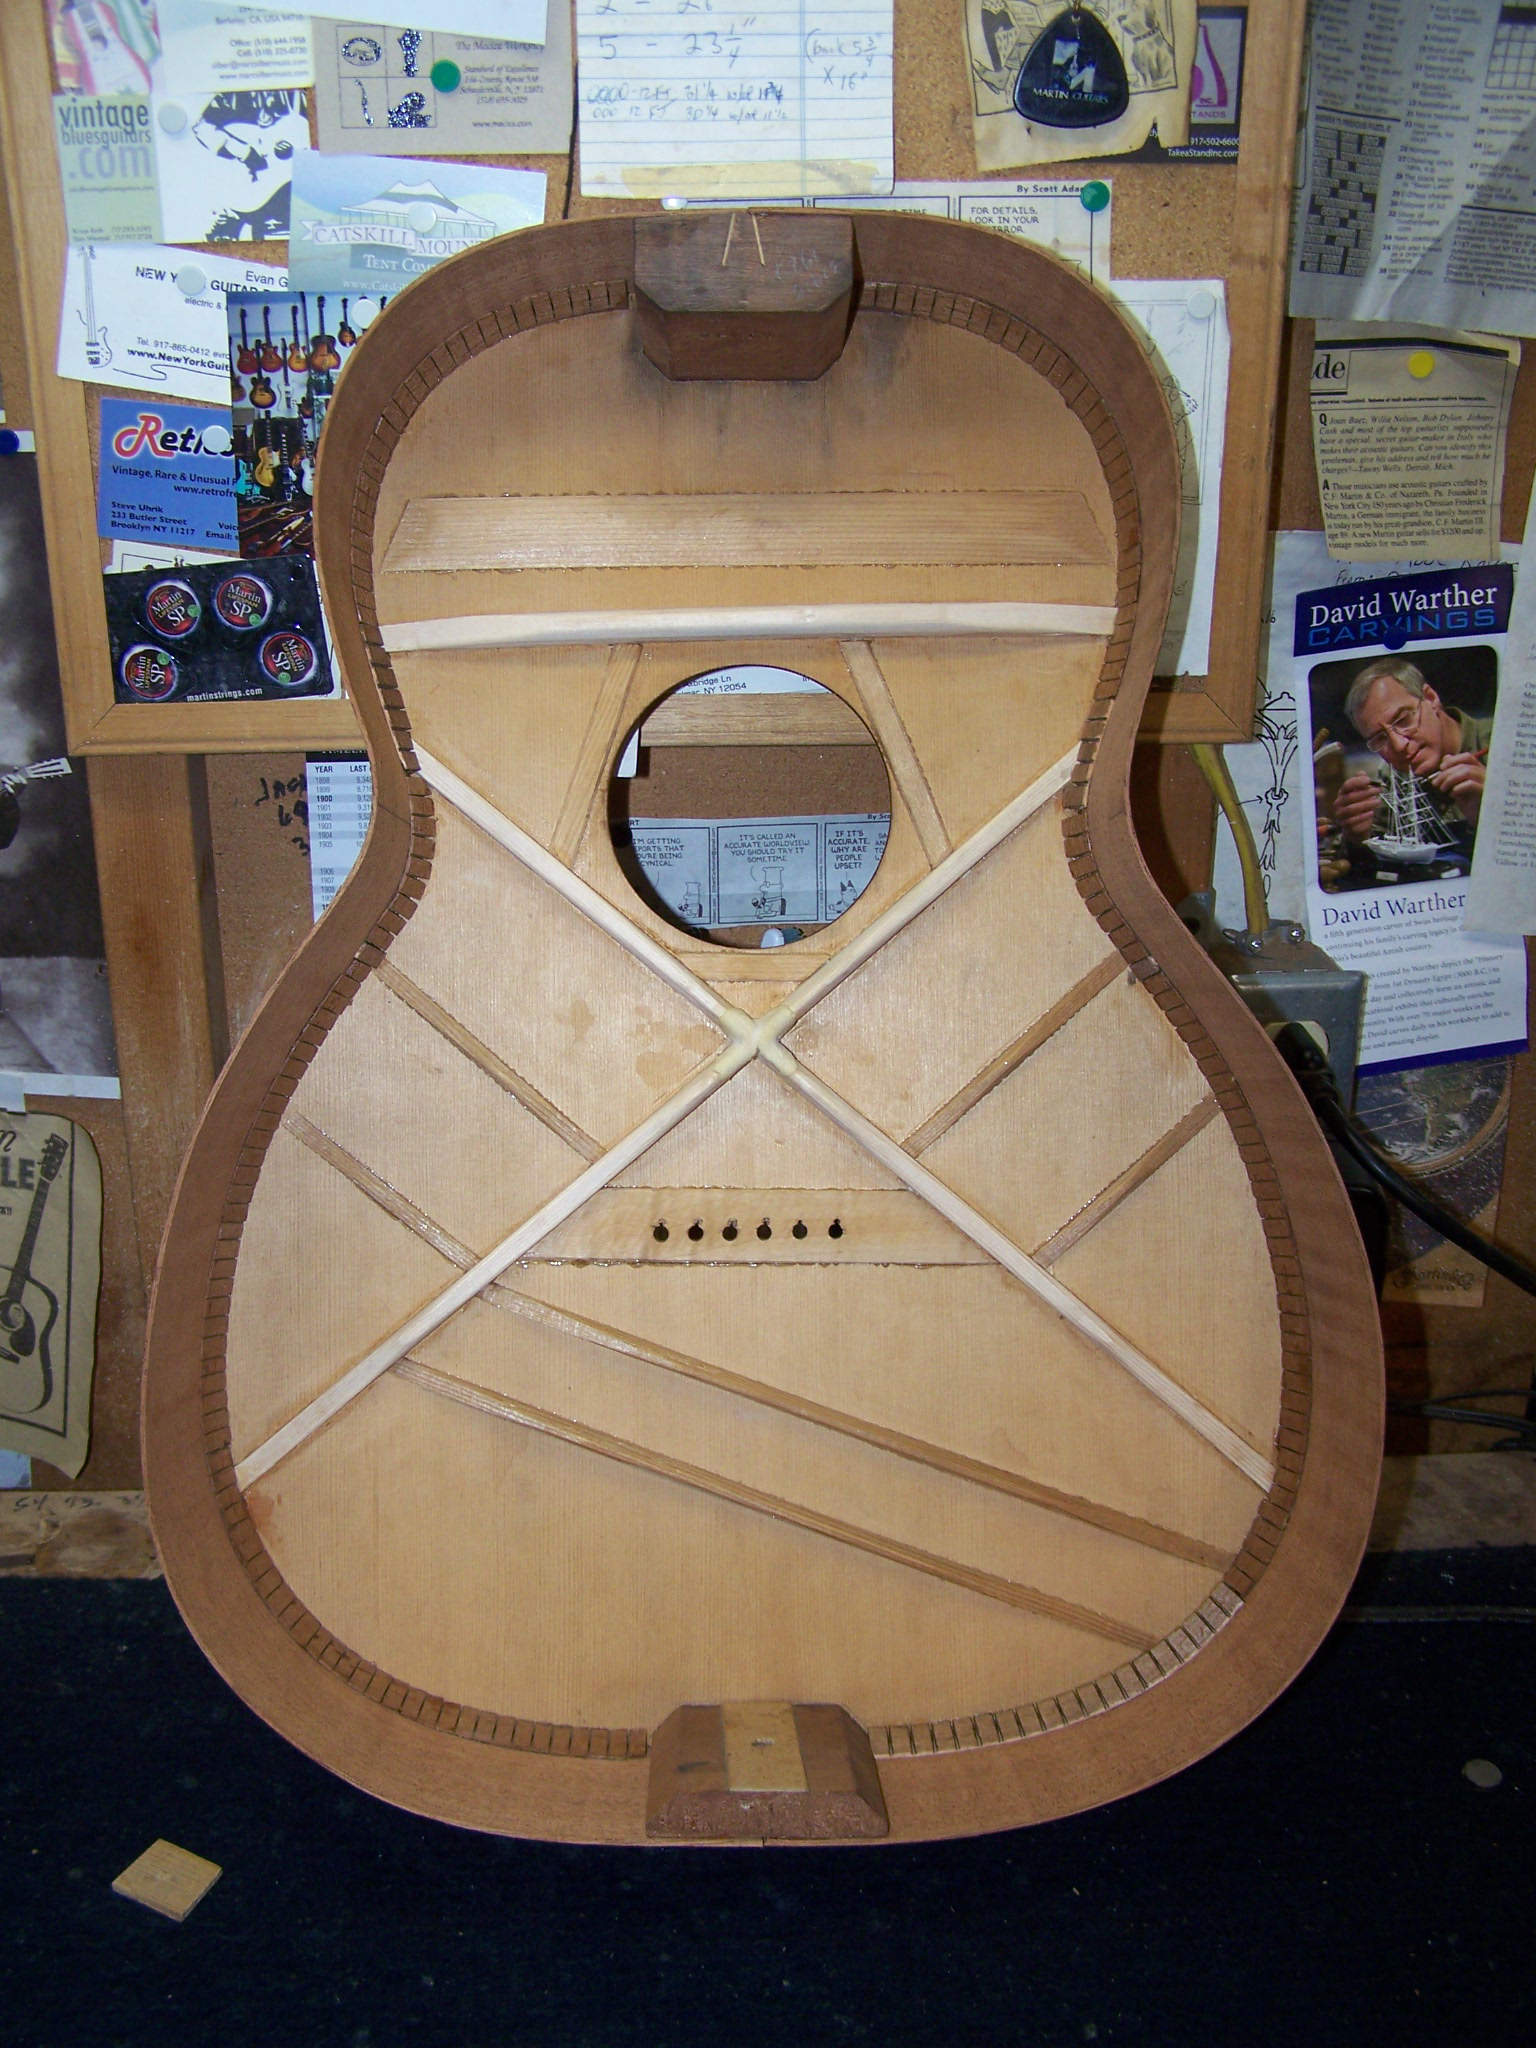 all these clamps in place. The longer open time of the fish glue made it a moredesirable alternative for this part of the job. Photo 8 shows the sides glued up to the top after being removed from clamping. After the glue was dry I checked thefit of the original back to the new sides, and it was very good, with only a few minorspots where some finesse would be required to make the fit perfect.
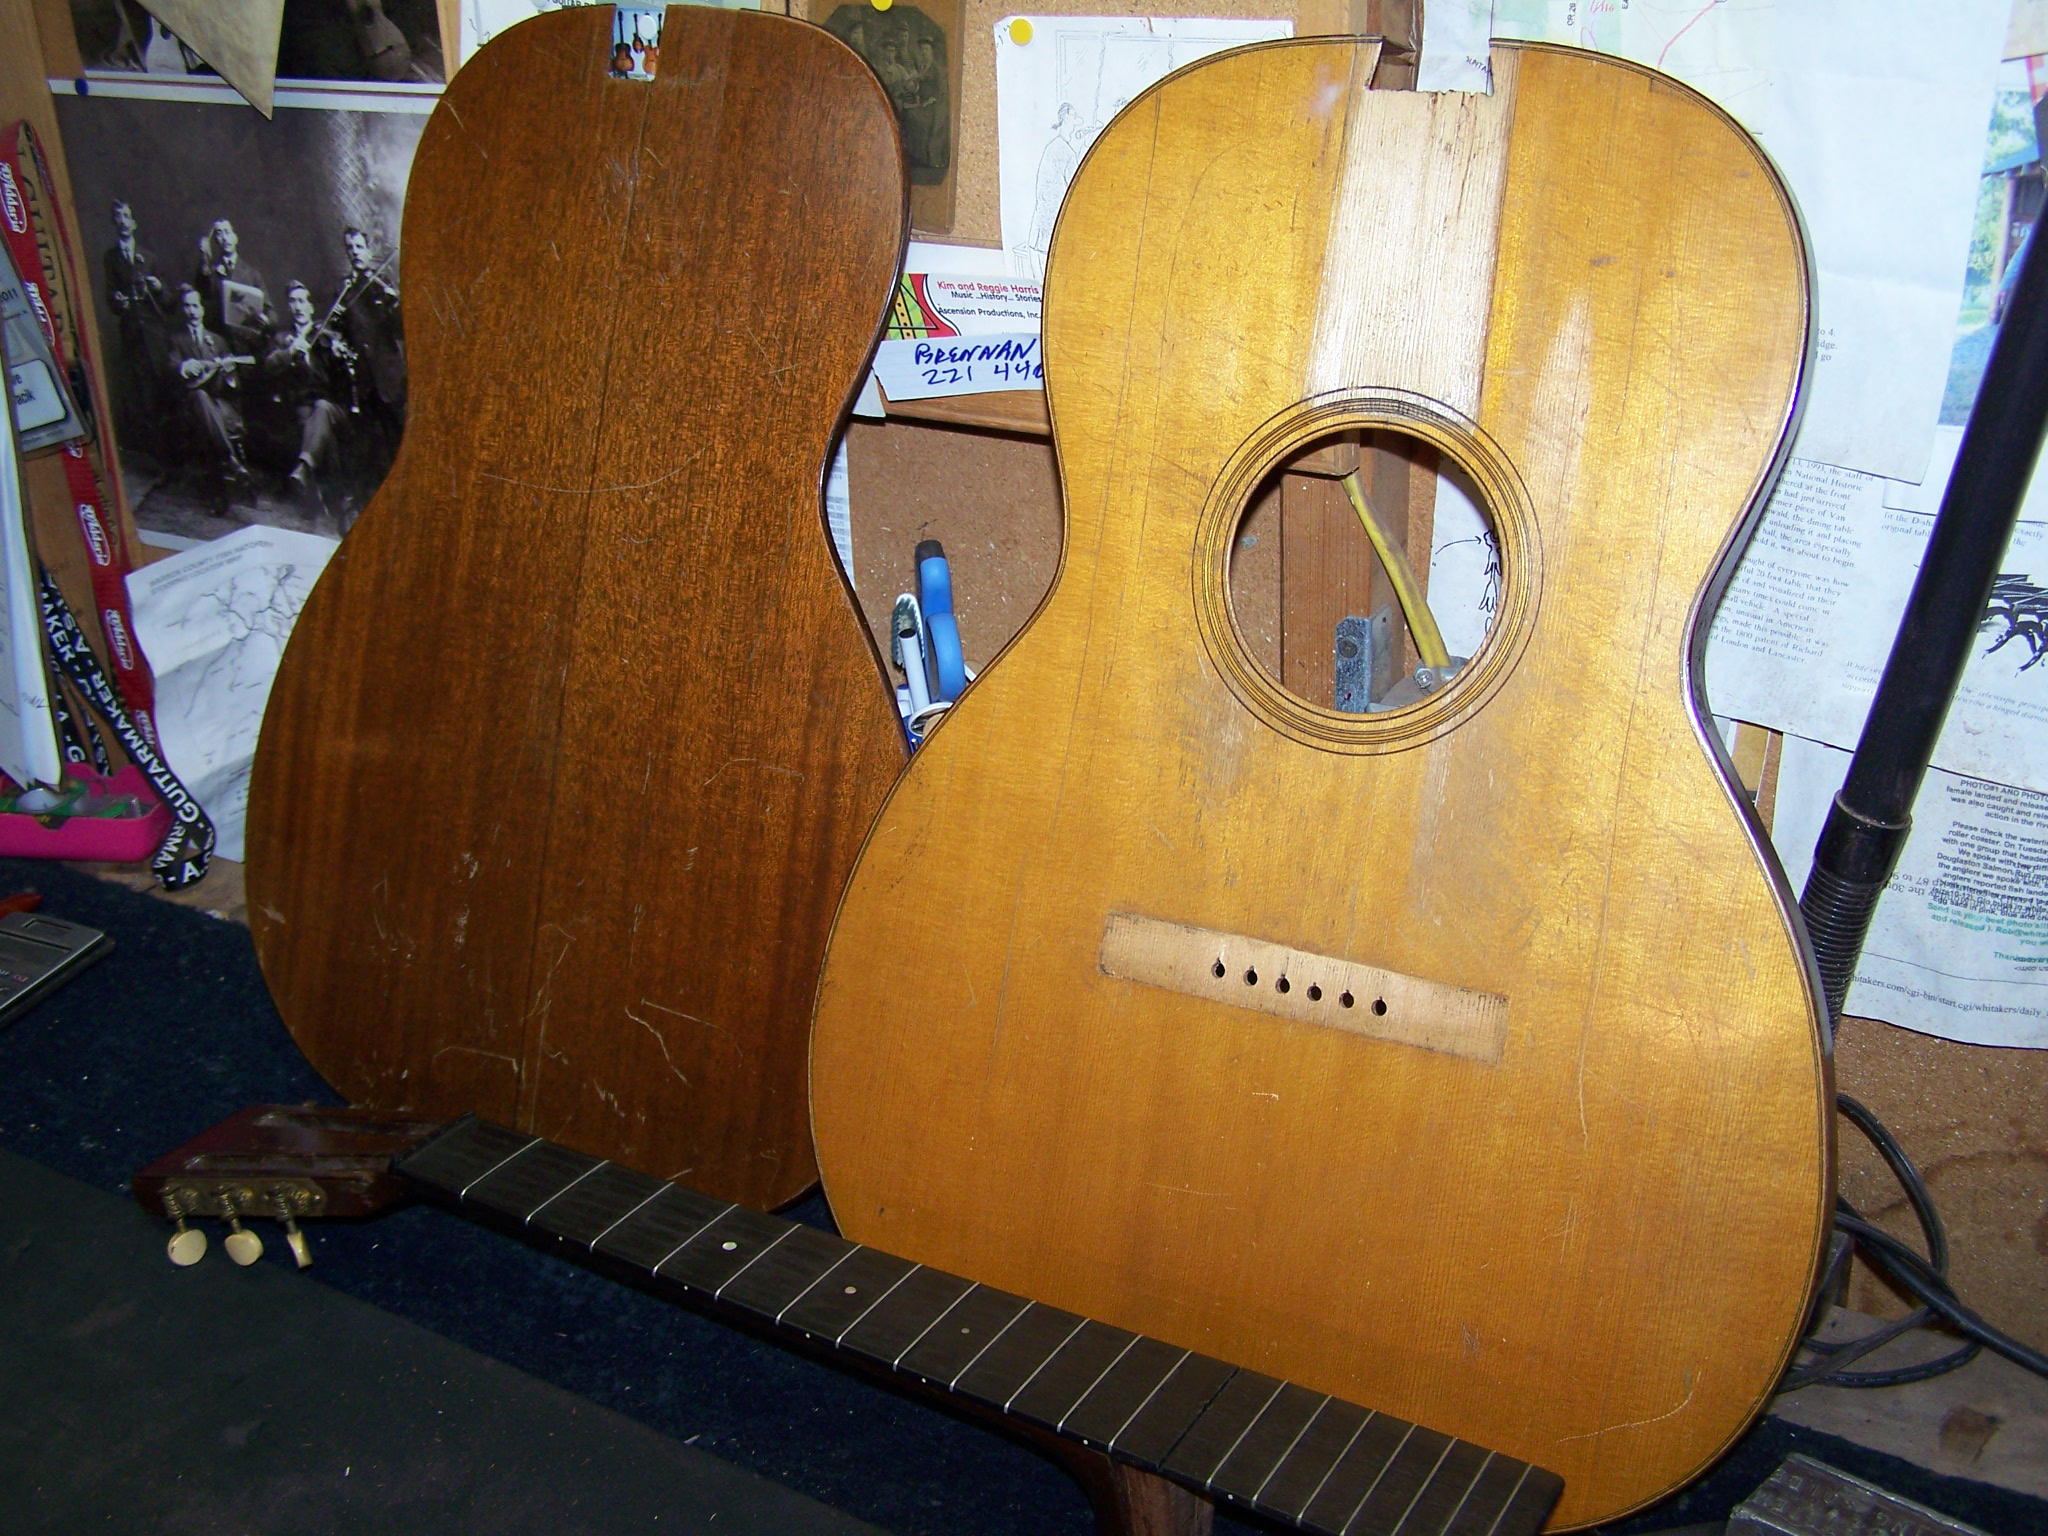
Now it was time to prepare the back to be glued to the 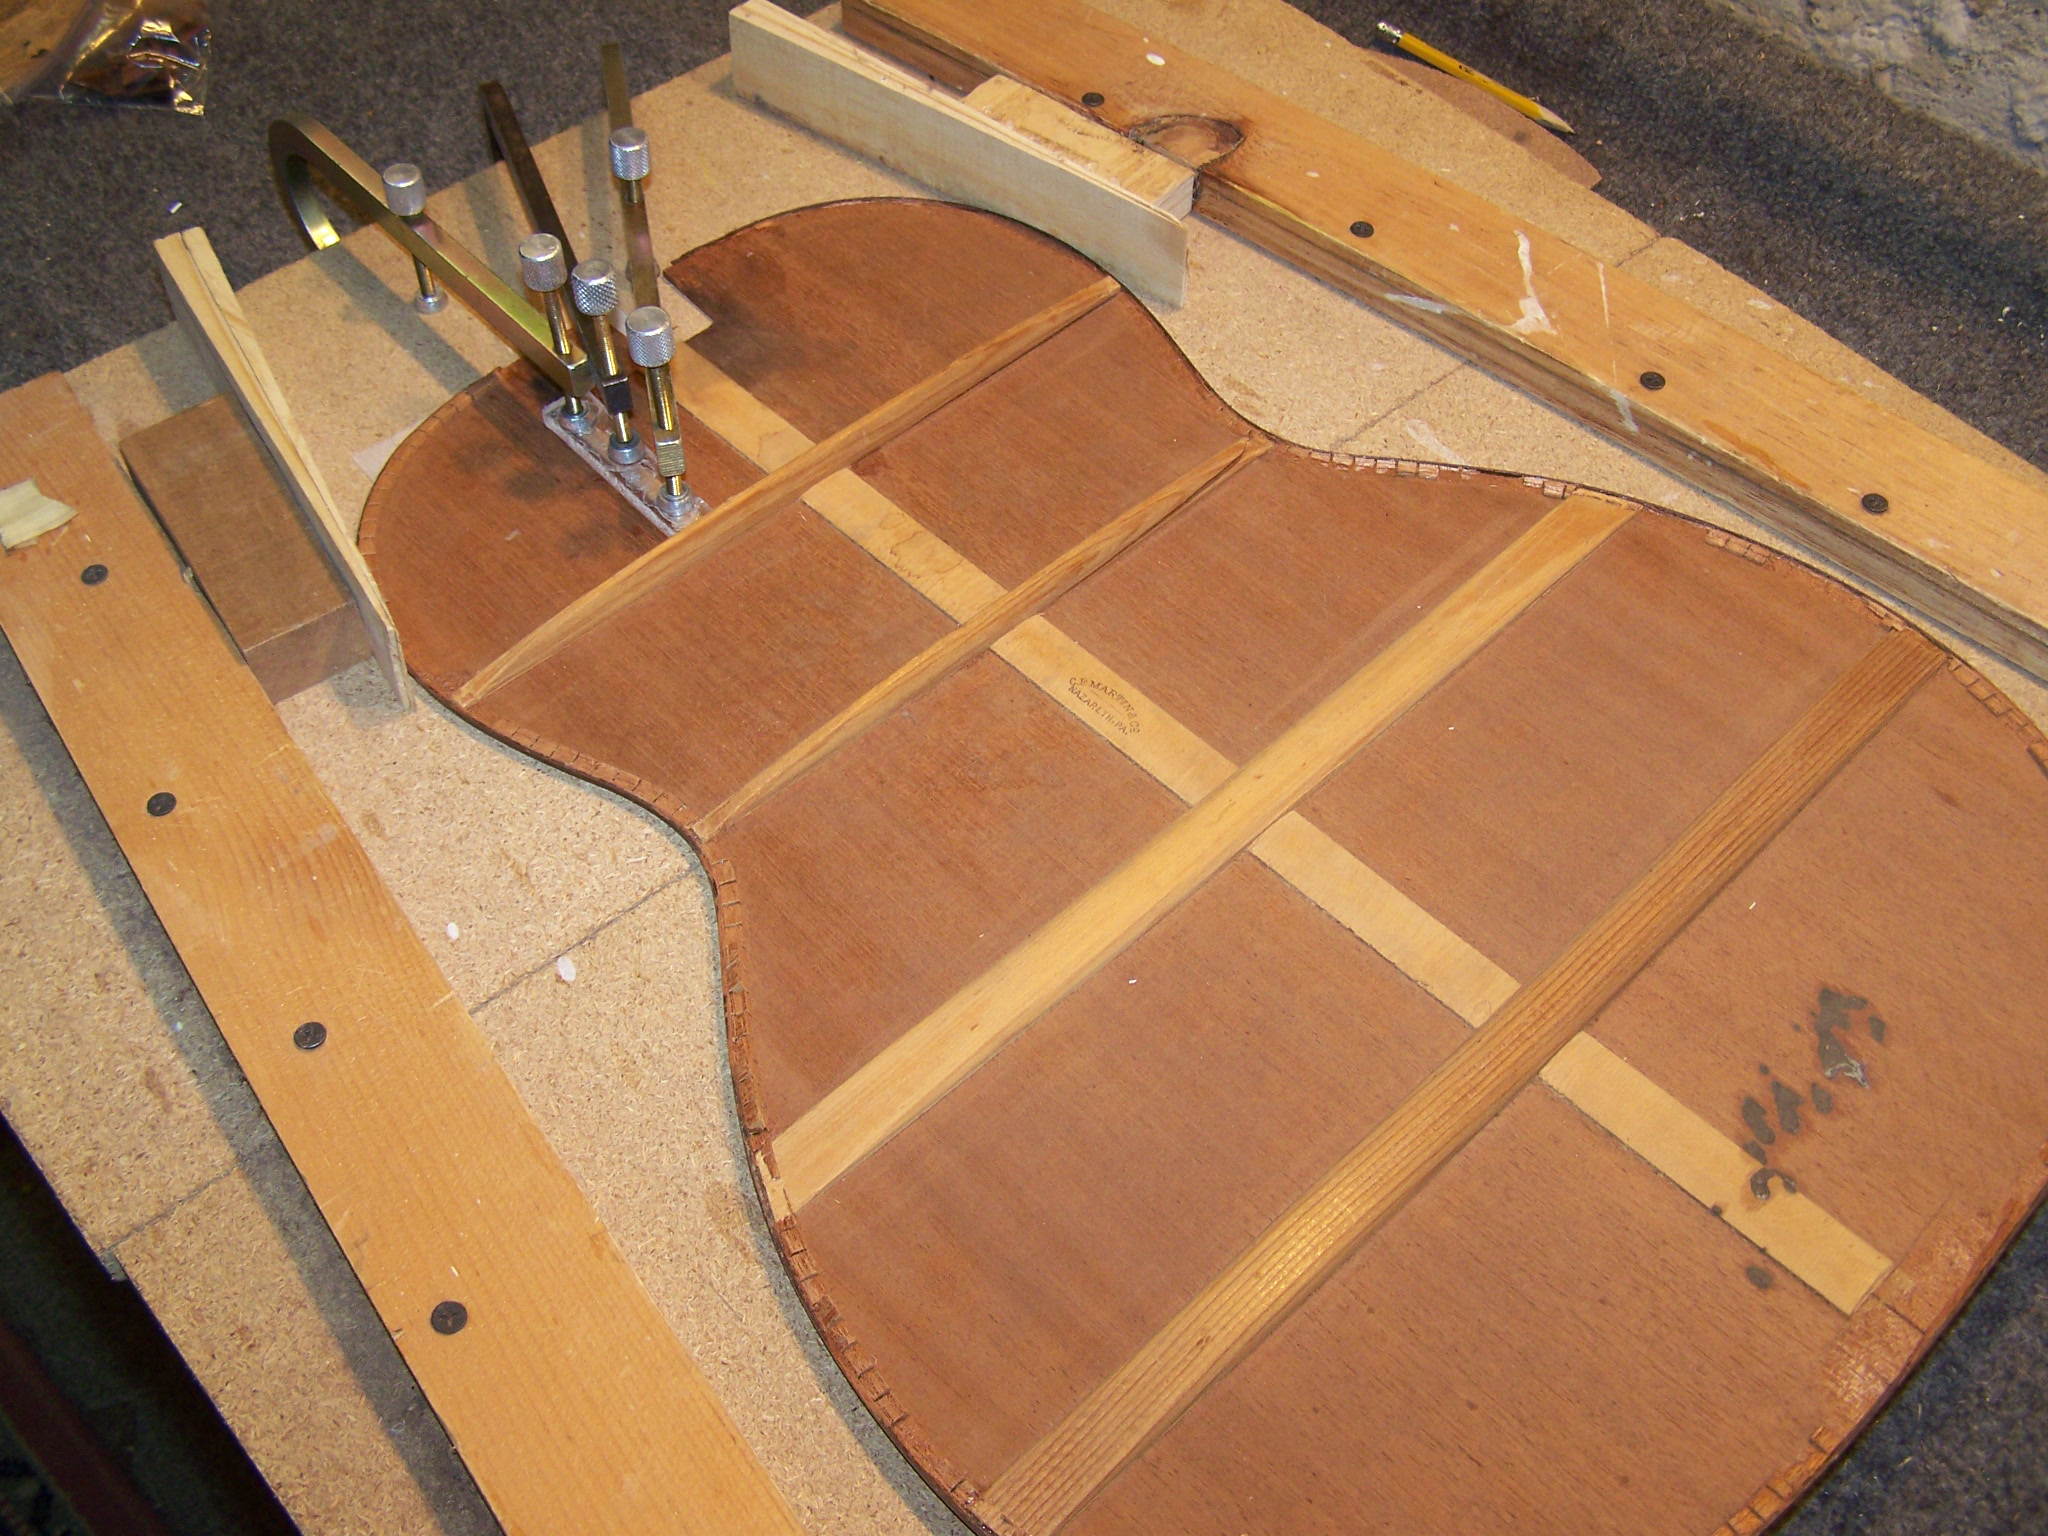 sides. The back had several hairline cracks and had a piece busted out by the neck block, allof which needed to be repaired. The cracks were glued, cleated where necessary.The busted-out piece of the back was still present with the back, so it was easy to patch that piece back in. Some of the original binding and kerfed lining was still attached to the back, so I used a sharp chisel to
 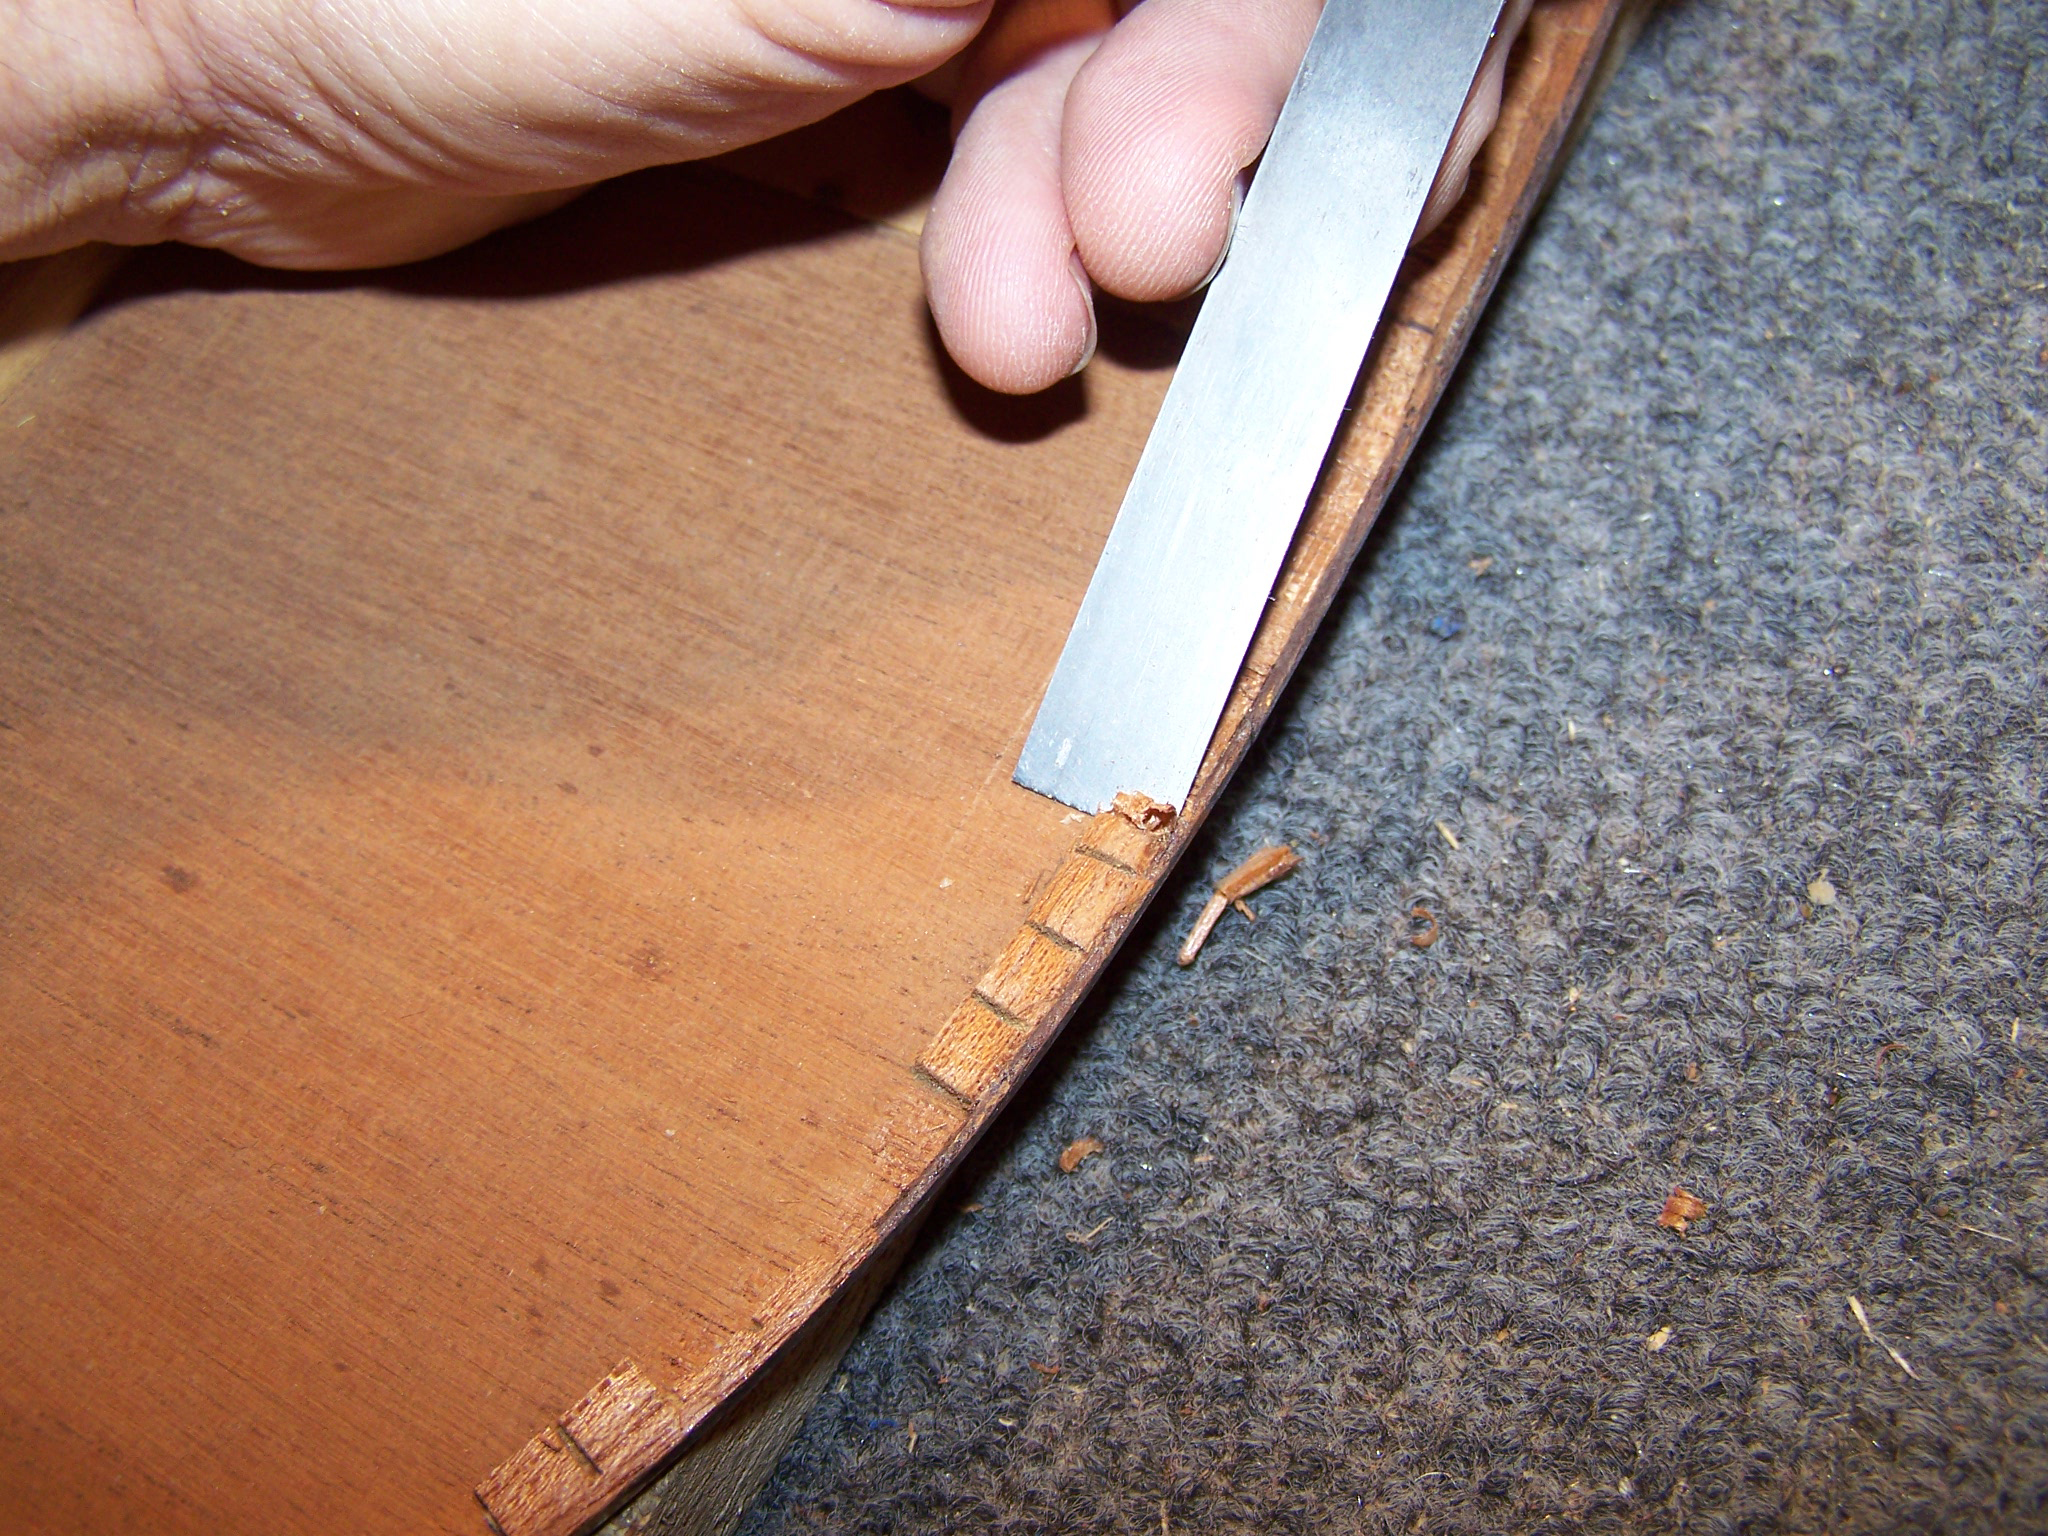 remove the remnants of both as neither was present in enough quantityto be useful.
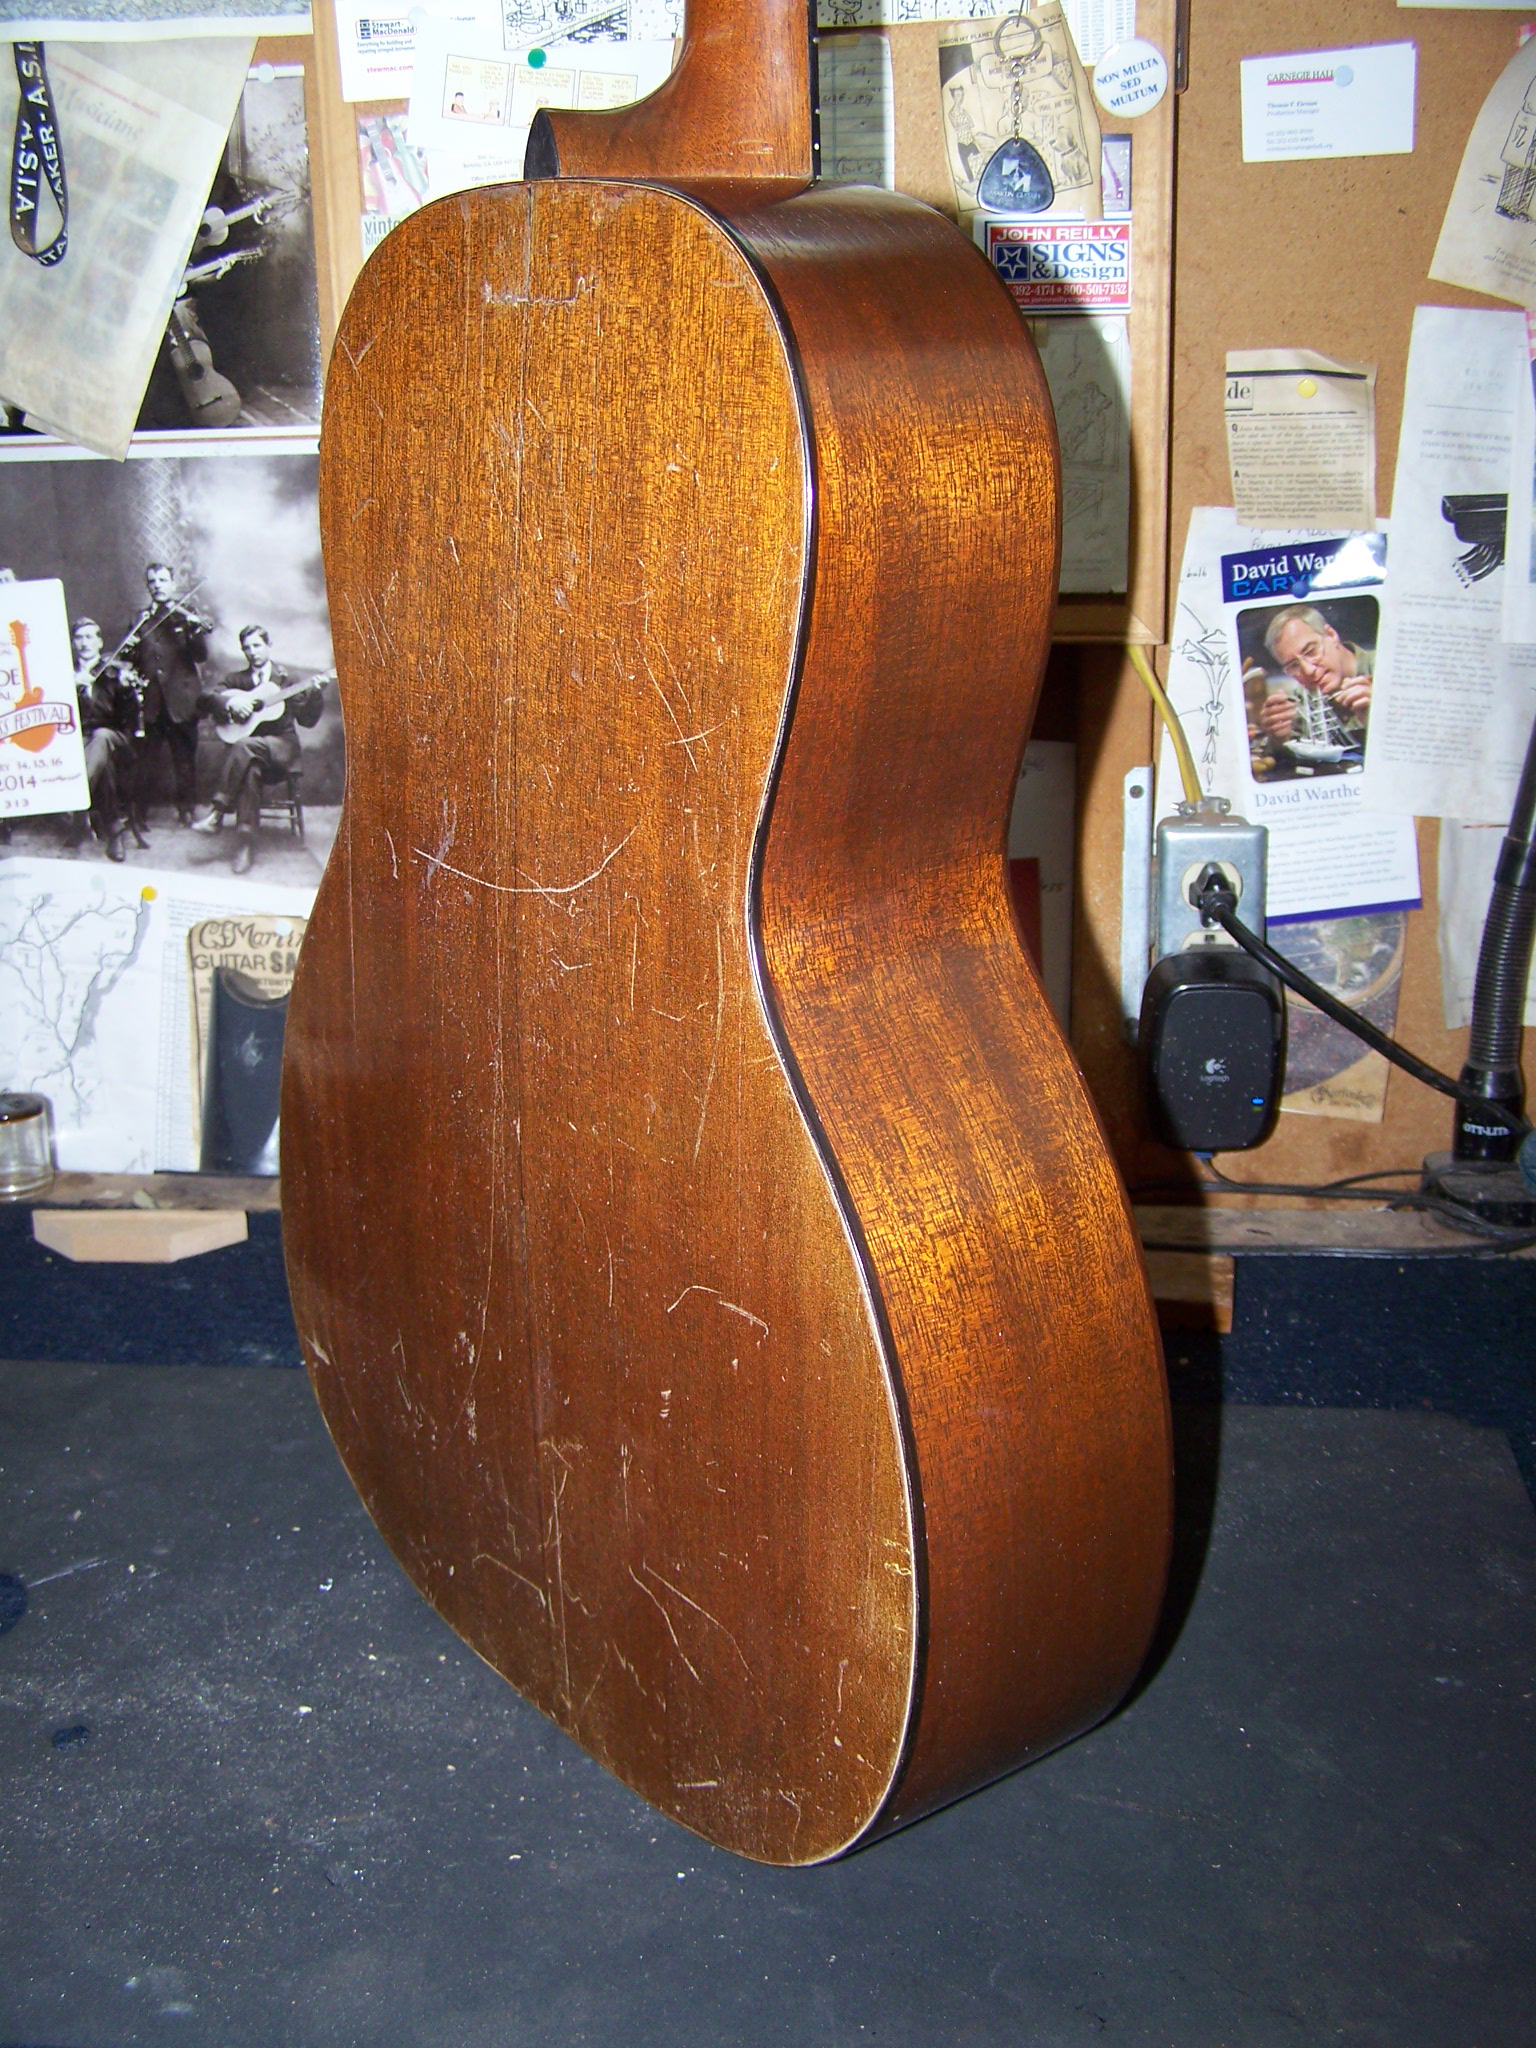
 New kerfed lining was then installed to accept the back. Afternotching the kerfing to accept the back braces and checking the fit the back was glued on the new sides. Iinstalled new back binding and then stained the sides to match the original color of the back. Though the side color is slightly lighter in the pics than the originalback color, pore filler and finish would darken the sides to a closer color match. The sides were sprayed with a thin nitro finish and the surface left with a soft sheen to match the
 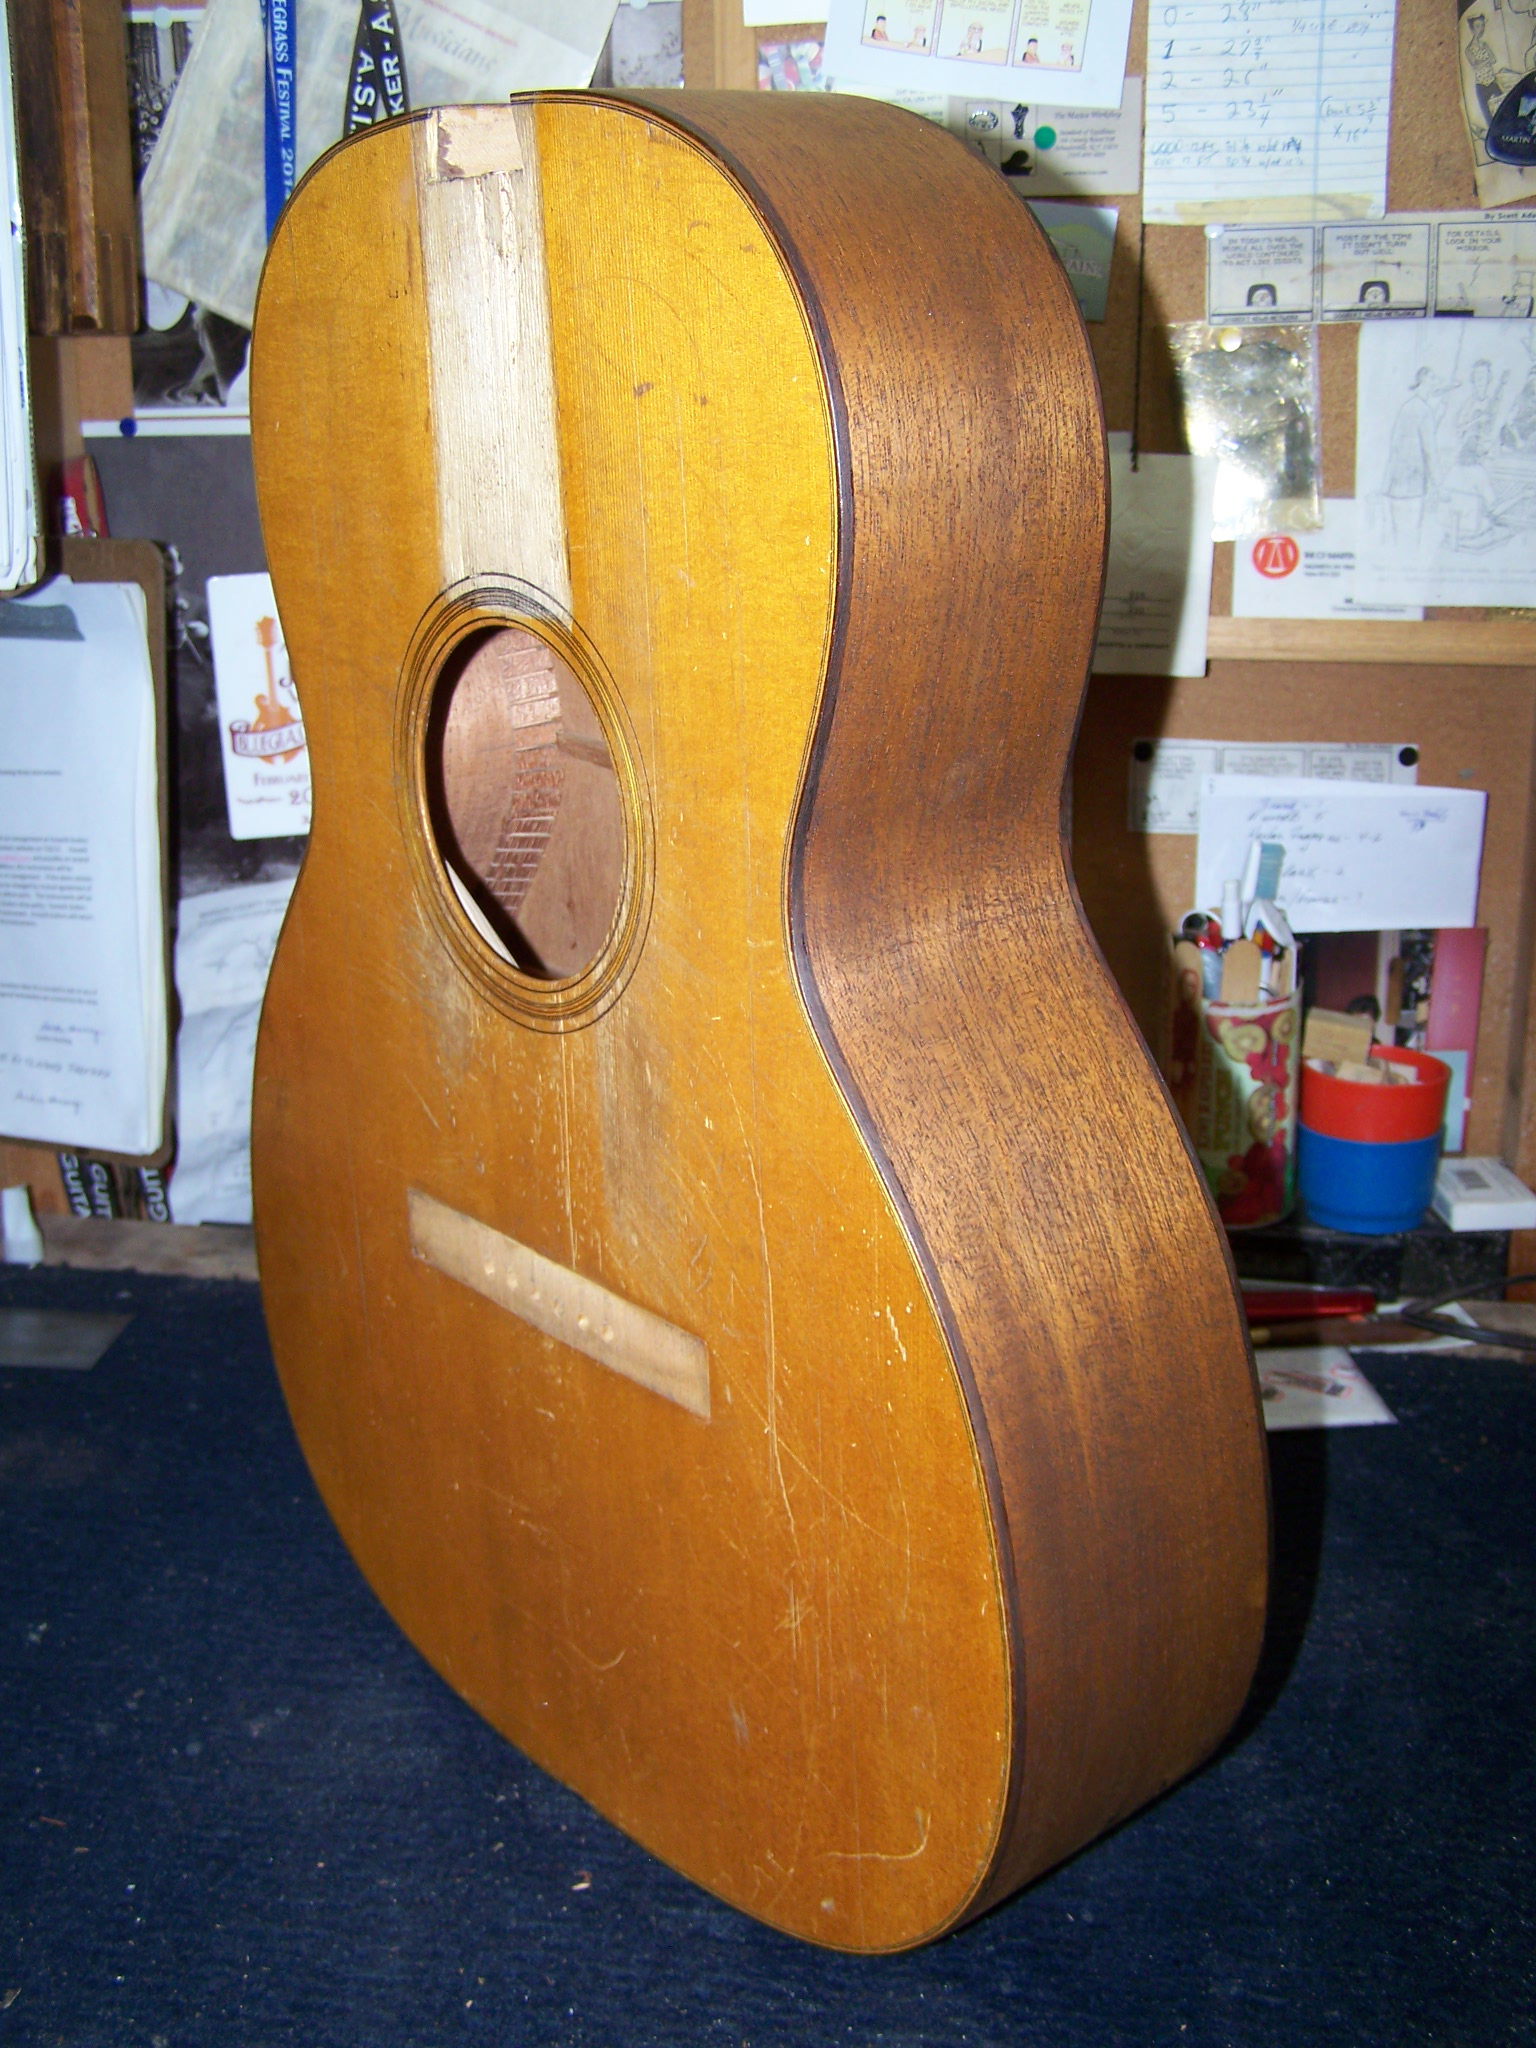 sheen of the original worn finish as best as possible.
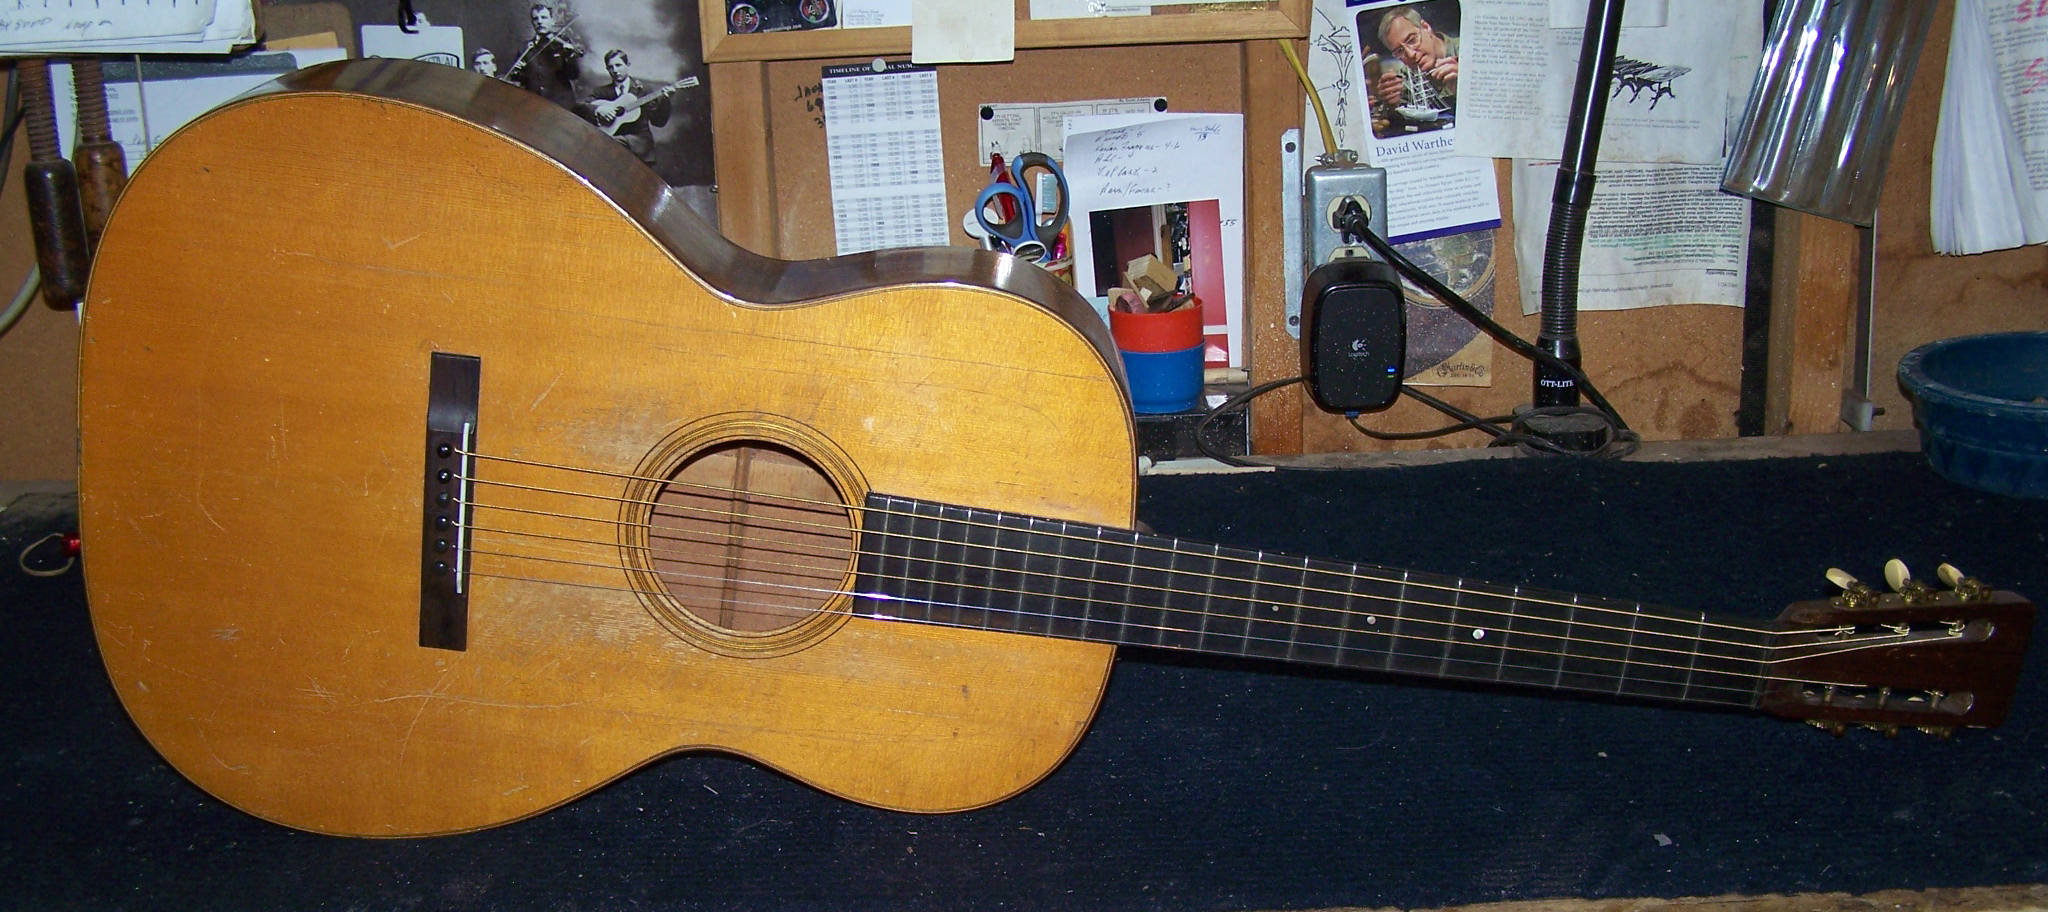
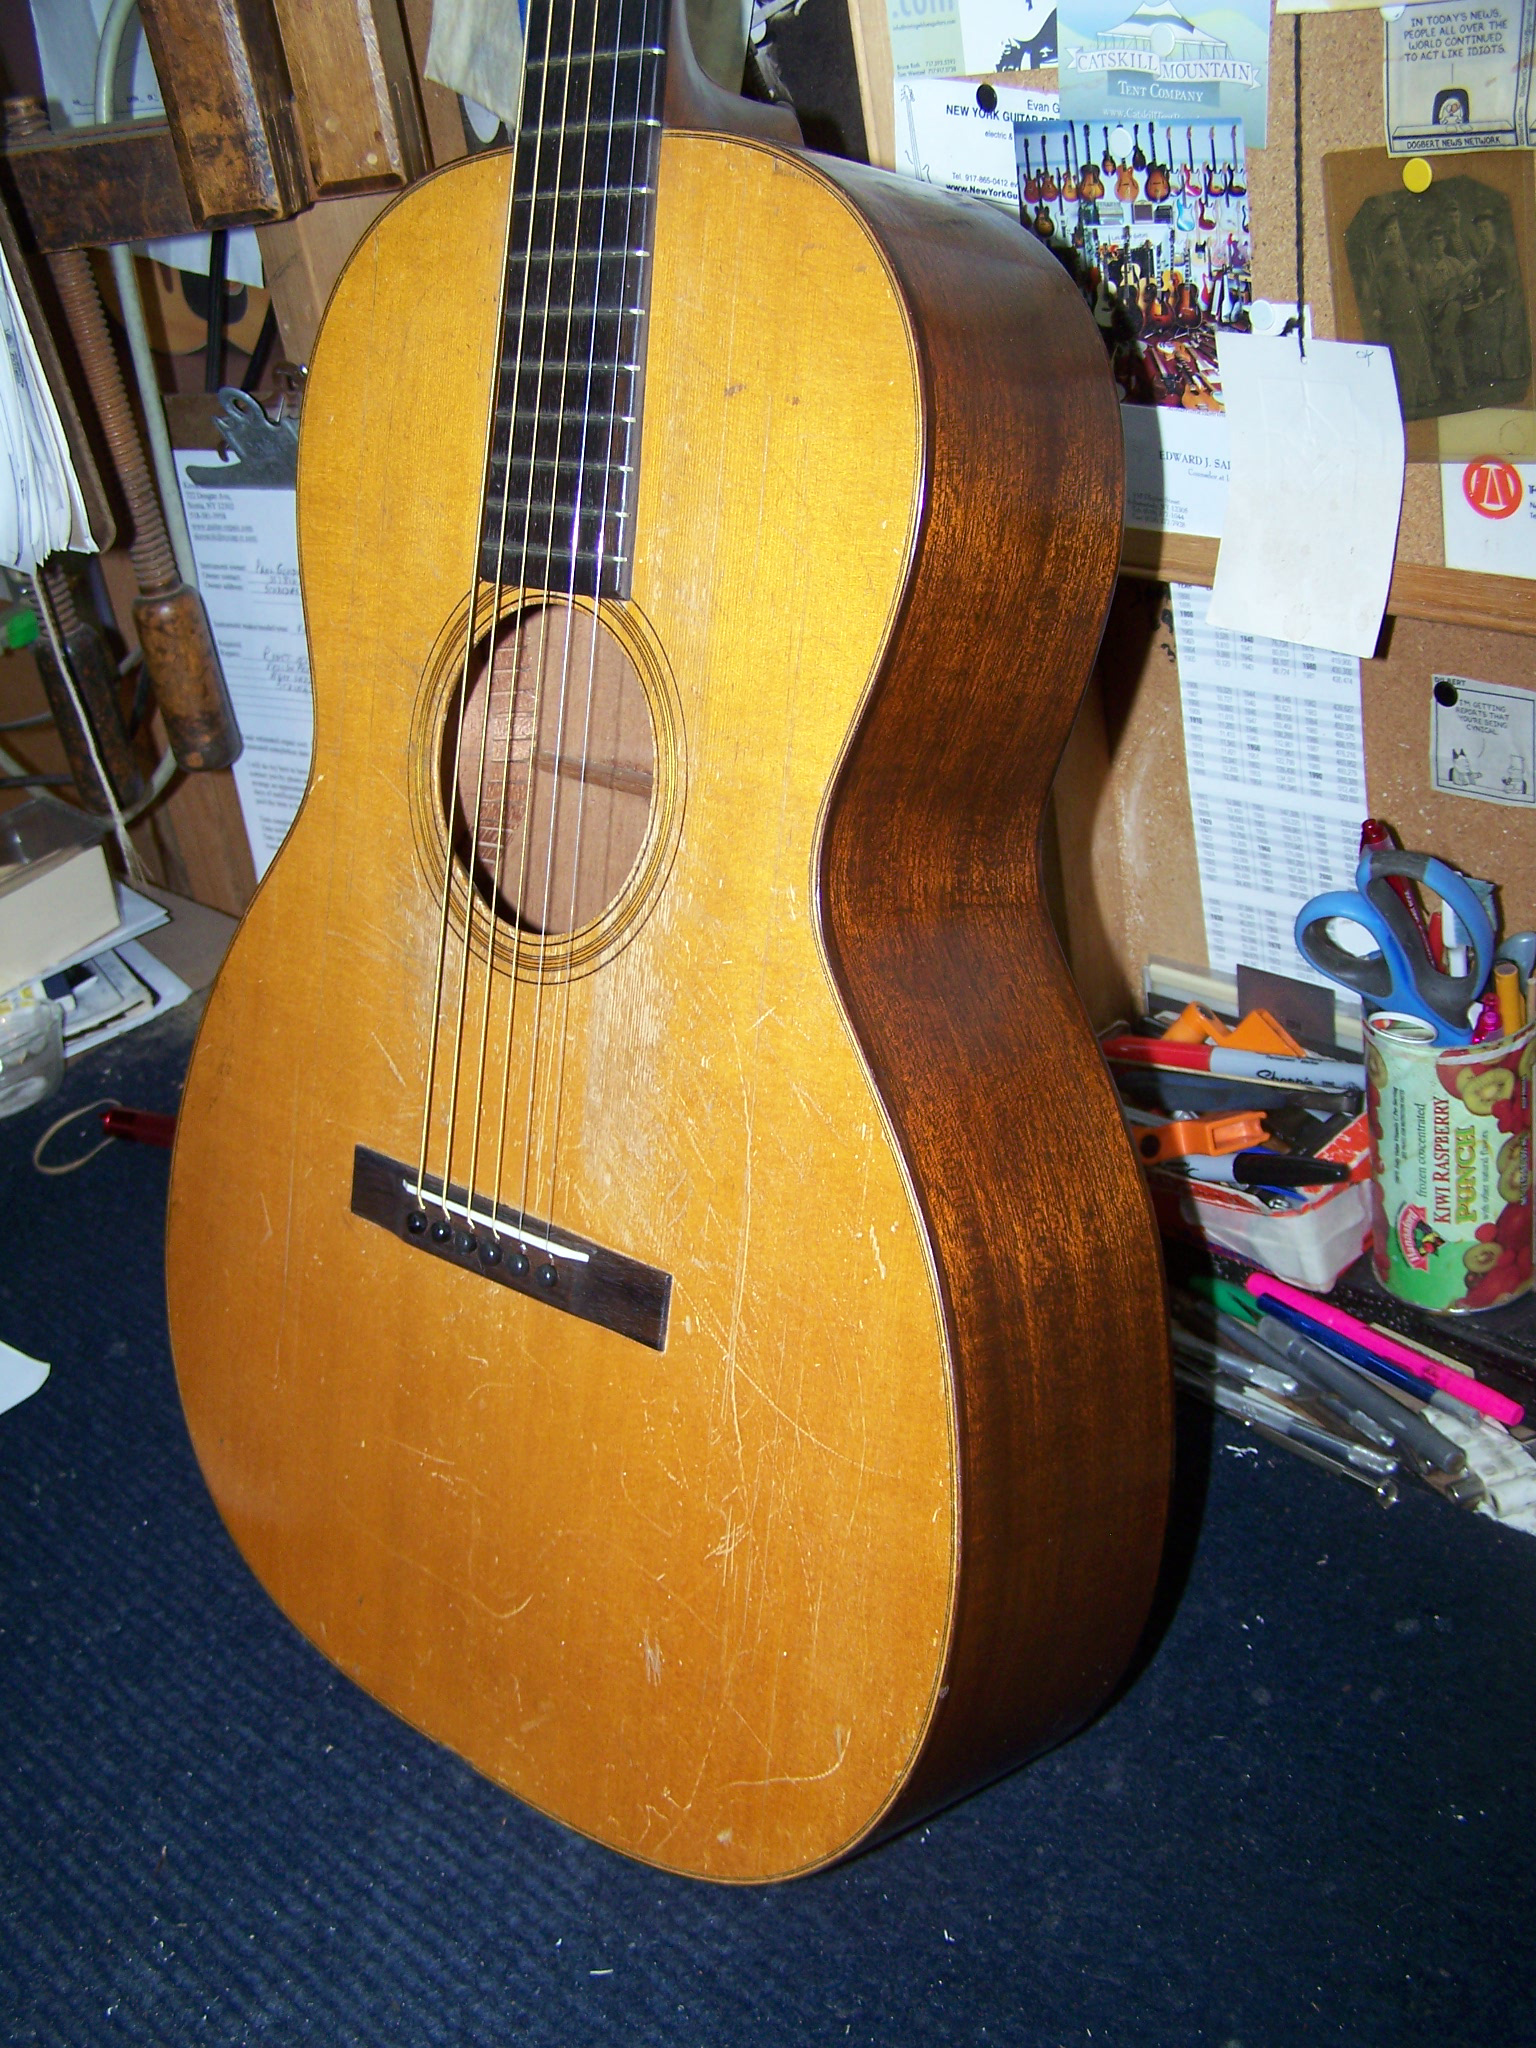
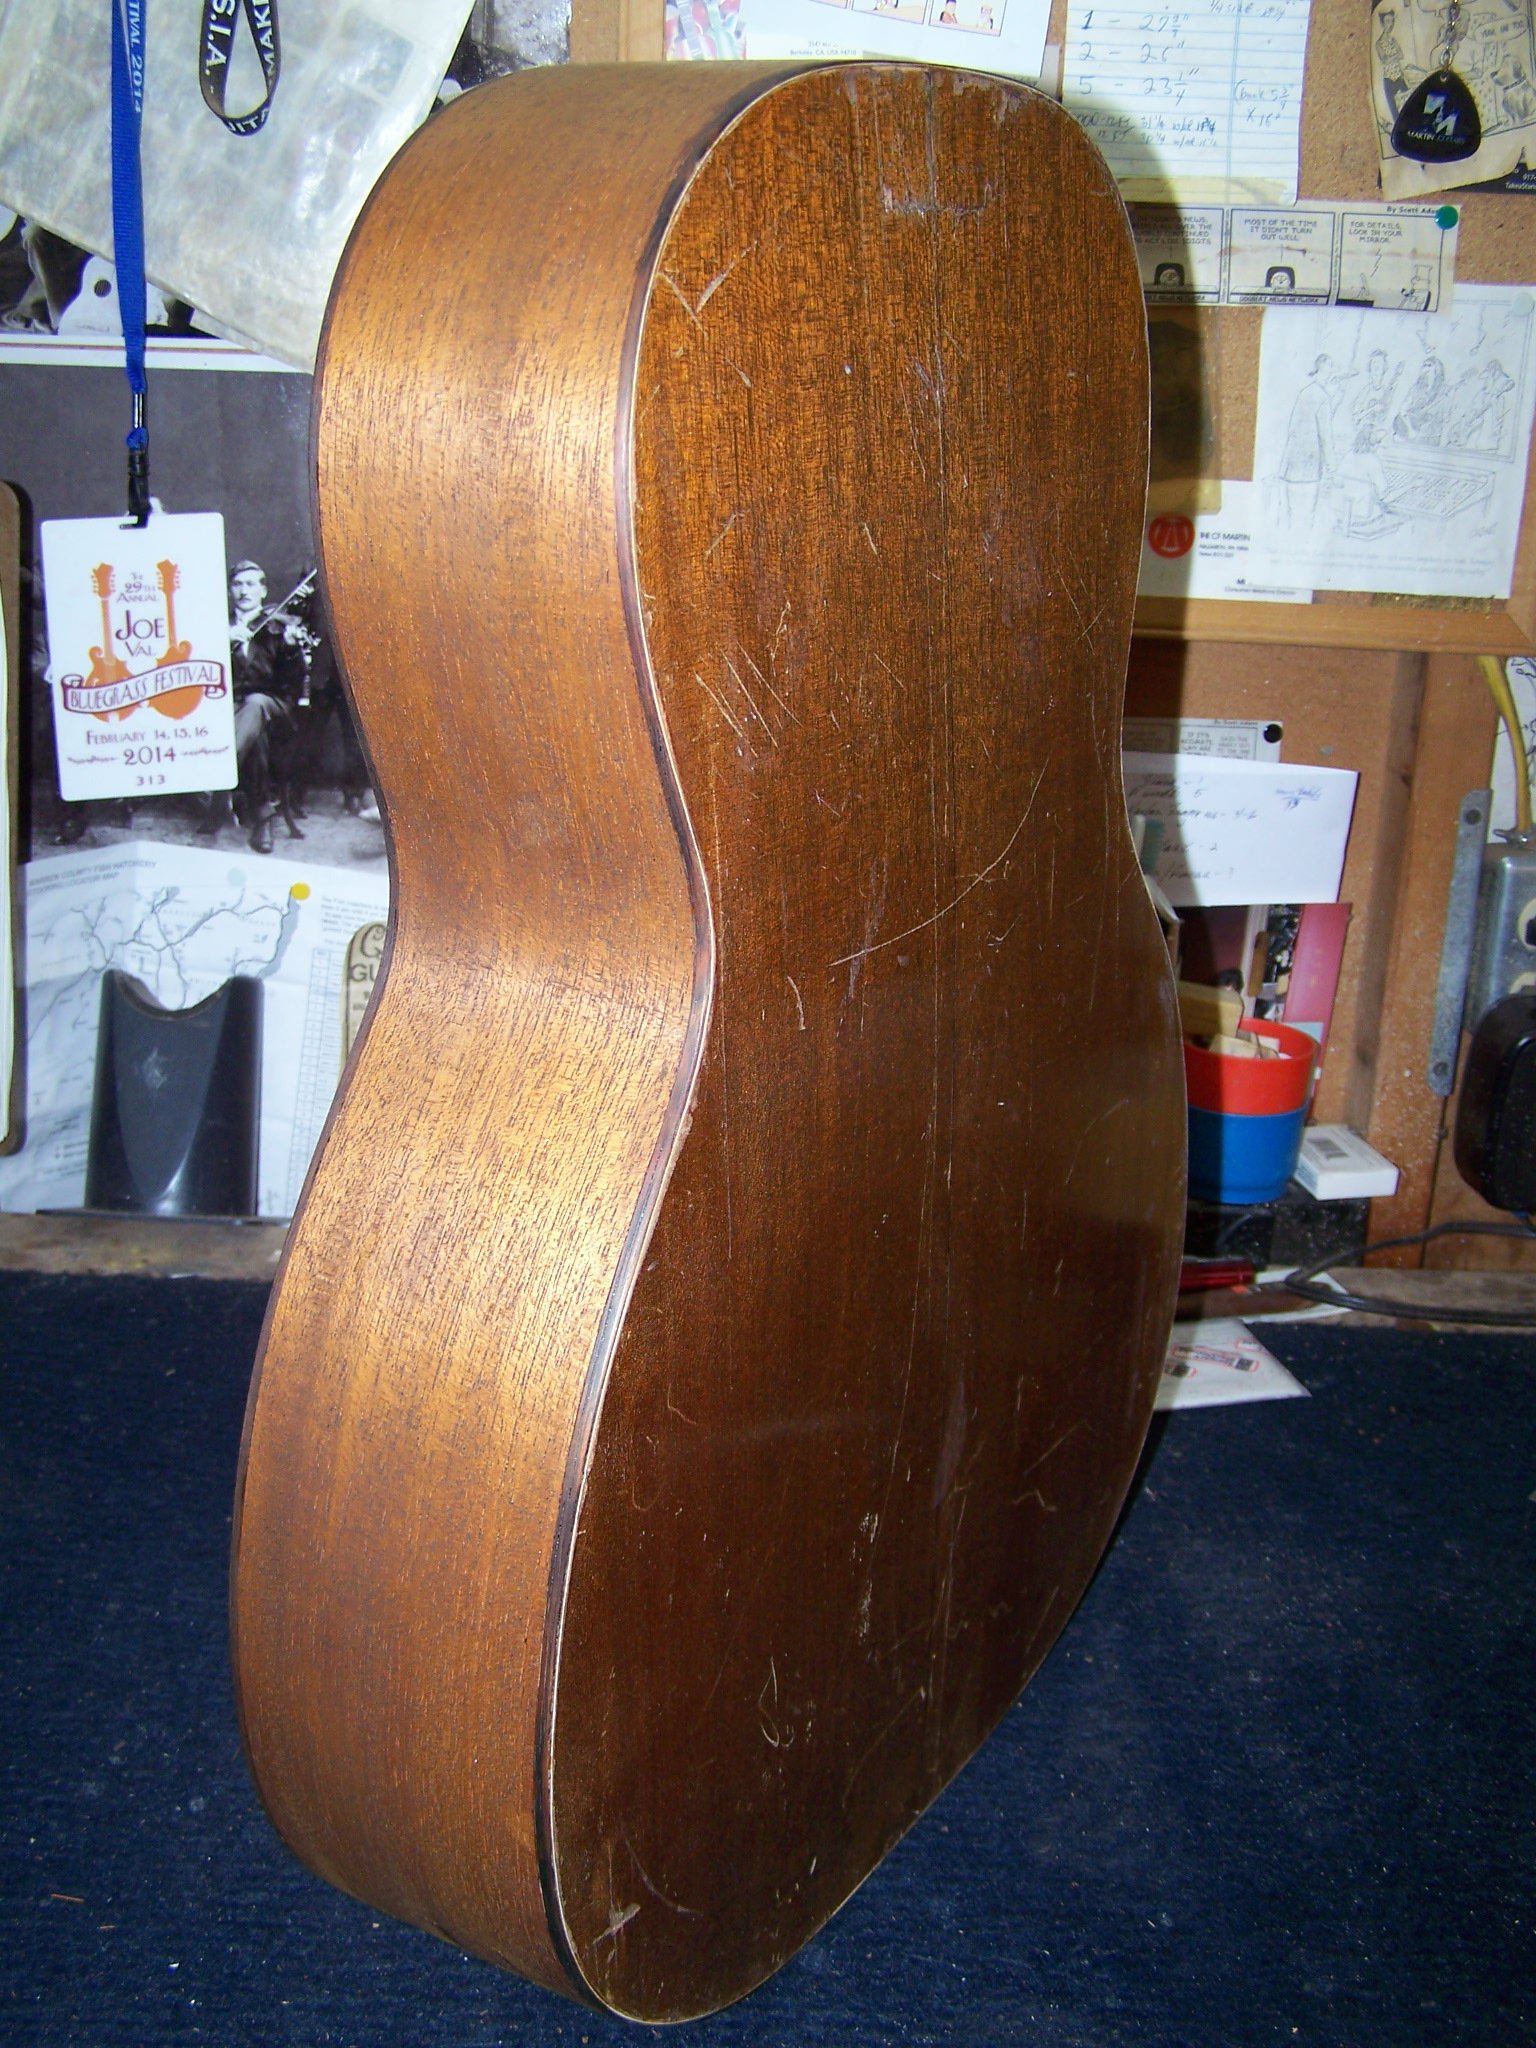 As predicted, the sides darkened a bit with the addition of pore filler and finish to create avery good color match with the original color on the back. The original bridge was then installed, the neck angle set and neck installed. Final set up work included some fret leveling and crowning and a new saddle.
The final result is very good. The guitar is stable and looks good, and best of all it is a guitar again instead of a pile of constituent parts.