Articles
March 2009 — Restoration of a 19th Century Martin Pyramid bridge
Recently I had a very nice and very early Martin (about 1840) in the shop that was missing it’s original bridge. While I could have made a nice reproduction this project gave me the opportunity 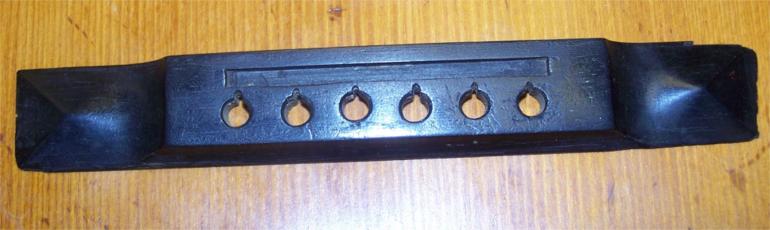 to use an original and equally early Martin pyramid bridge that’s been lying in my parts bin since I bought it from an elderly former factory employee several years ago.The bridge that I had on hand is indeed from the 1840s and the right size for the guitar in question but the bridge had been
 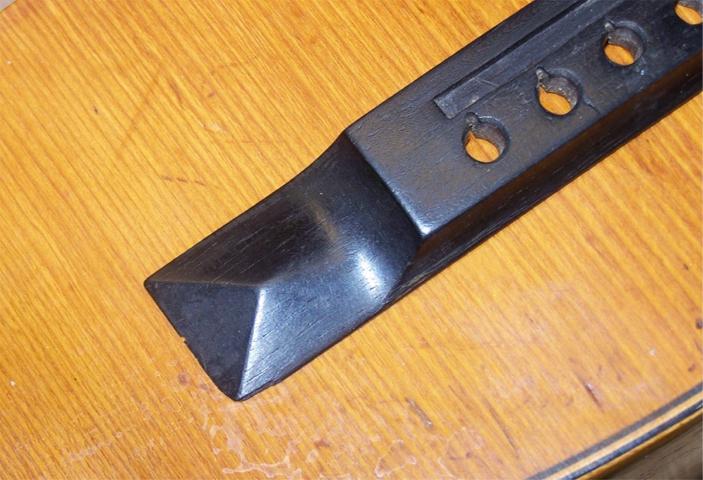 on and off a guitar several times in it’s long life and as such had a fairamount of chipping and edge damage on the bottom,particularly on the ends. The bass side of the bridge wasn’t too bad but it did have the lower point slightly rounded and a small chip at the edge.
 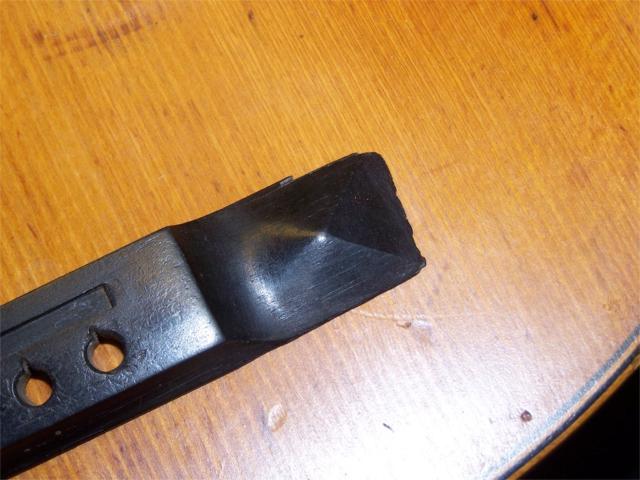 The treble side was the worst of it. As you can see, the treble side of the bridge was chipped on it’s front edge and had a significant amount of loss on the very end that resulted in the end not being square and the length of the bridge being shortened on the back edge by about 1/8”.
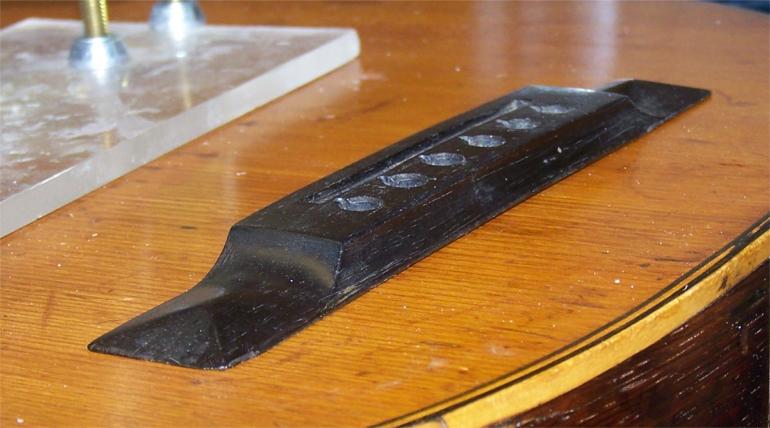 The bridge was also quite thin, I think it had likely beenthinned through loss of material during previous removalsbut also possibly thinned from the bottom to flatten it during a previous repair. The result was that the wings of the bridge were very thin and in need of a little work to beef them up and enhance the overall stiffness of the bridge.
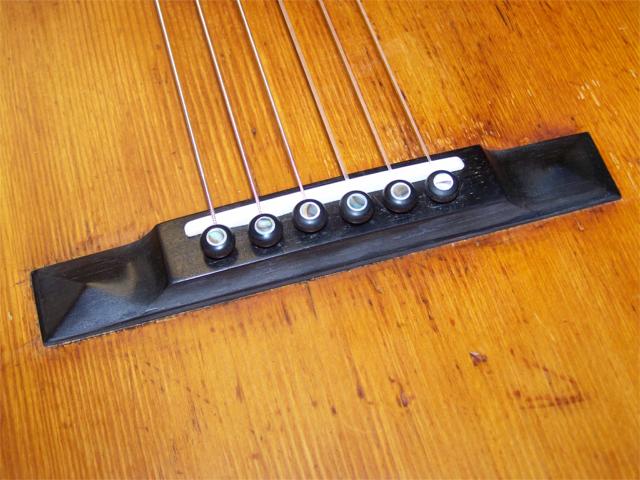
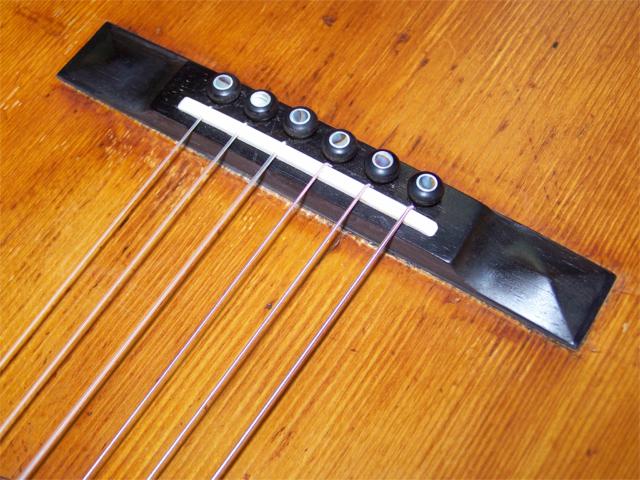
While examining the bridge it is also worthwhile to note the differences in shape and contour that this bridge shows as opposed to the later and more familiar Martin pyramid bridge shape. Later bridges have the crown more radiused both along the length and depth than this early example. The earlier bridge has a flatter crown along it’s depth and slightly less crown along it’s length than later designs. More significant though is the ramped facet on the back of the bridge. In all four previous pics you can see that the back edge of the crown has a ramped or concaved facet that isn’t seen on later pyramid bridges. In addition, while it is commonly held that the “drop-in” style saddle is a 20th century development, clearly this original old bridge shows that drop-in style saddles were in use on some Martin guitars during the 19th century.
The bridge, in order to be usable again had to have two things done…it needed a little more dimension on the base to add some rigidity to the very thin pyramid ends. Second, it needed  material added to the ends in order to facilitate re-carving of the very edges where chips anddamage had altered the original shape and dimensions. The first step of the repair was to make an ebony “foot” that was just slightly larger than the size and shape of the original bridge profile. This foot would add thickness (and thus stiffness) to the base and provide the additional dimension on the ends to restore the proper length to the bridge. Once the foot was glued to the bottom of the original bridge the ends
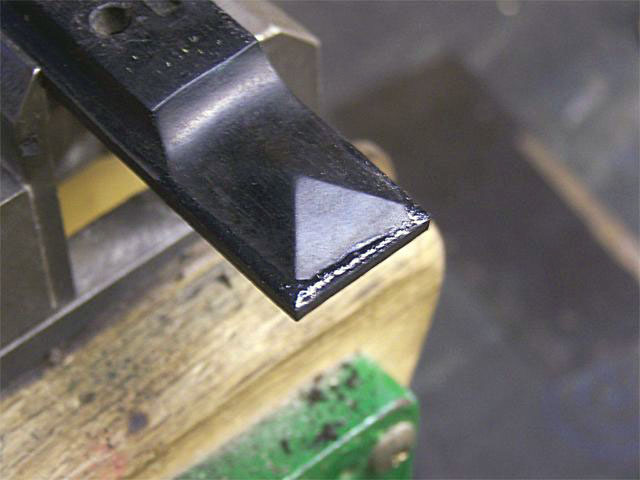 were squared off to proper dimension and the tiny bit of extra dimension protruding on thefront and back edges of the bridge were trimmed. This left the original footprint of the bridge only with no extra dimension except on the very ends where missing dimension required restoration.Then, on the very ends where deficits existed they were filled with a mixture of ebony dust and glue. Once dry, this dust and glue mixture provided fill for the areas that had been chipped away and that fill could now be shaped and carved to restore the proper shape to the ends of the bridge.
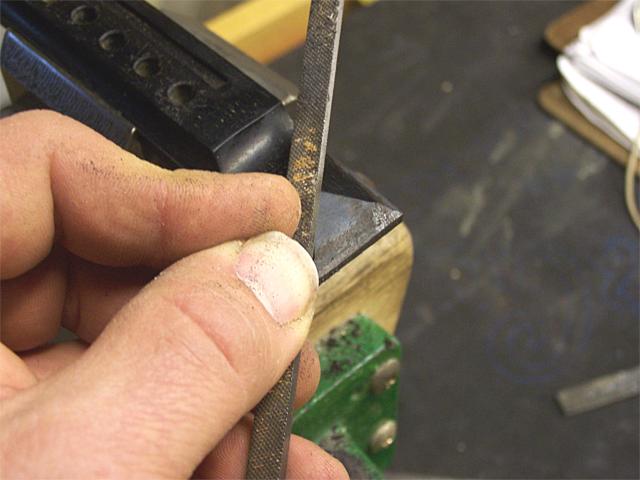 After the glue and dust mixture dried and hardened the bridge was ready for re-shaping. Usingseveral small files I followed the contour of the pyramids to shape the ends. The glue and dust mixture, being black, blends well with the original ebony surface and the new base that was glued onto the bottom of the bridge. After the bulk of the shaping was done with the files I went over the new surfaces with light
 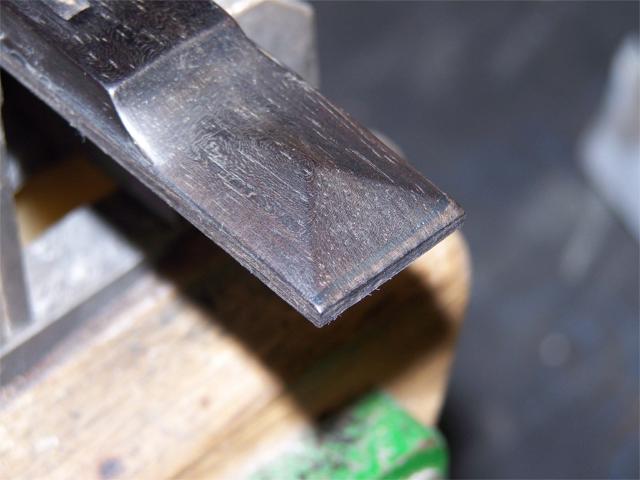 sand paper to clean up the file marks and then with micro-mesh papers to shine it up a bit and establish the rightpatina to match the rest of the bridge. As you can see, the original shape is restored with proper dimensions and sharp ends, though there is a little colordifference between the very
 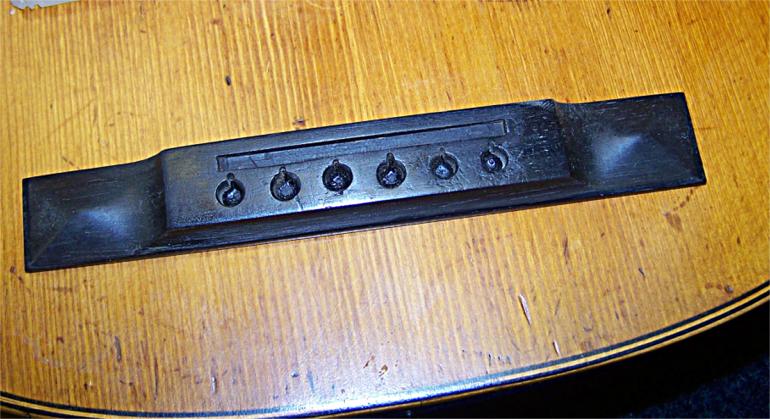 black original surface and the slightly different black of the ebony used for the base (insert 19th c. Martin bridge 9). A little bit of black stain applied sparingly to the end and alongthe new base took care of that nicely for a repair that is noticeable only on the very closest inspection.
The last thing to do was to thin the new base until the bridge was the desired height and the ends looked proper, as the ends of these bridges were always quite dainty. I thinned the bottom directly on a belt sander, being very careful not to go too far and undo all that had been accomplished. Once thinned to the proper thickness the bridge was installed on the guitar. A proper ivory saddle was made and installed to complete the job.