Articles
April 2009 — Re-top of an 0-16 NY without disturbing the original binding
In my last re-top article (the re-top of the ’66 D-35) I demonstrated a method that involved removing the top and its original binding. Though that binding was re-used on the finished guitar it is, for certain projects, possible or even preferable to be able to remove and replace the top without disturbing the original top binding. The removal of the binding leaves a visible seam where the original lacquer finish surface is broken. Even if the original binding is replaced, this seam and any small bits of chipped lacquer (common in binding removal) can easily be seen requiring finish overspray of the binding and sides to make this seam go away. In the case of the D-35, the entire guitar was going to be oversprayed to freshen the overall look of the instrument. But in many cases it is preferable to leave original finish surfaces uncompromised by overspray or other alteration. The method described in this article eliminates the need for side and binding overspray work by leaving the original binding in place.
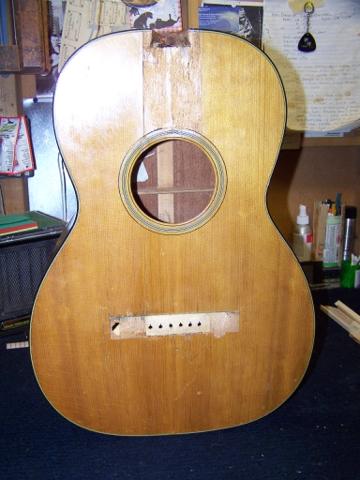 The guitar used for this demonstration is a 1972 Martin 0-16 NY. The guitar, as can be seen in these ‘before’ photos, had a severely compromised original top that was no longer able to withstand string tension. The bridge area of the top had been busted clean through from several previous incidents of damage and “repair”. It appeared that the top had been crushed inward as there were multiple long cracks on both sides of the bridge and from the bridge foot print down toward the end block, including significant cross grain breaks.
 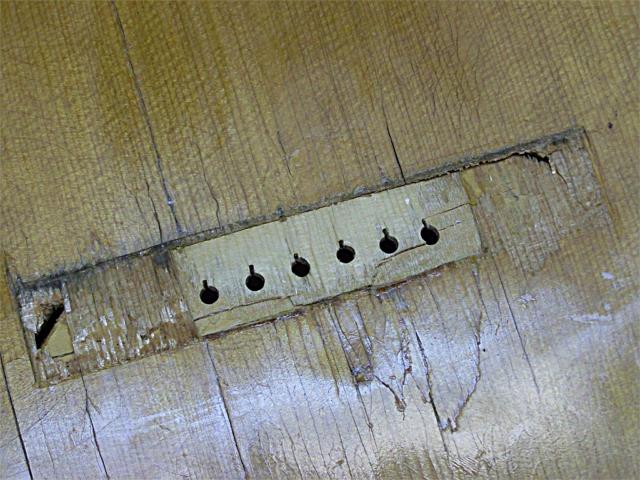 These cracks had been poorly repaired in the past as had the broken X bracing on the inside. The top beneath the bridge was very thin due to multiple bridge removals/replacements and at least onepoorly done bridge plate replacement. As a final insult, the guitar has had a very poorly executed spruce patch underneath the bridge where the spruce had torn or broken all the way through leaving a hole in the top big enough to drop a cat through. The result is a top that is clearly beyond saving.
 The trick behind this method is to trim your replacement top so that is perfectly matches the profile of the inner edge of the original top purfling. That is, the new top, before bracing is attached, must be trimmed so that when the original top is removed to the inner purfling edge the new top will simply “drop in” to the void and meet the purfling edge as perfectly as the original. The first step in this process is to cut a quantity of small spruce blocks that will be used to “block up” the new top over the original top. Since a binding router bit with a guide bearing will be used for the trimming the blocks should be relatively short so as to allow the bearing to ride along the side of the guitar, preferably allowing it to ride right on the binding and not on the wood of the guitar side (more on why later). I used scraps from a guitar top, the pieces were about ½” square and about
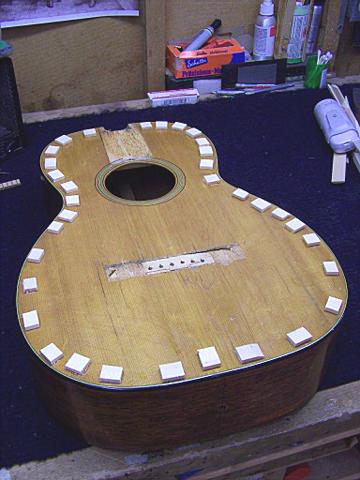
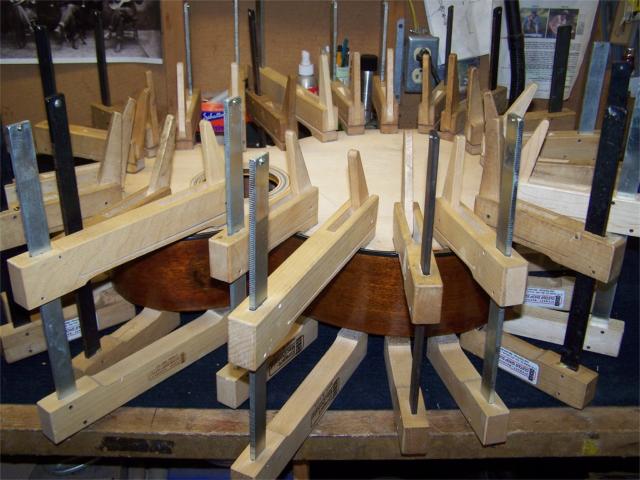 1/8” thick. All should be the same thickness. These blocks are then glued around the perimeterof the original top of the guitar with Duco cement. I used about 3 dozen blocks and spaced themrather close together as the new top should be well supported by these blocks when the trimming is done. Once the glue blocks are in place and the glue dry they served as a “platform” to which I glued the new top for trimming. The top that I used is a 1960s era old stock Martin 0-16 NY top that was factory joined and rosetted,
 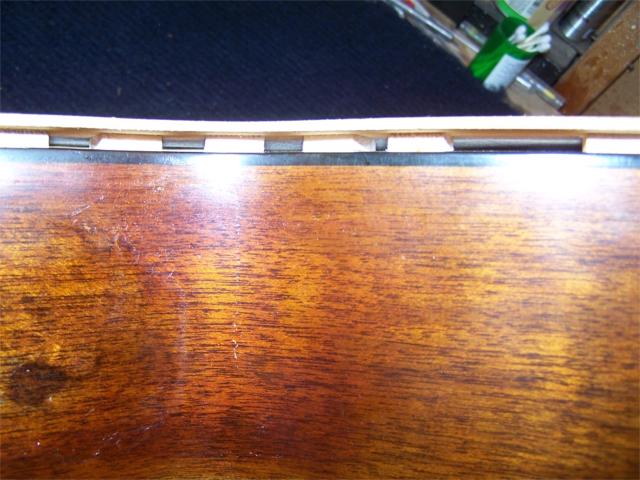 thickness sanded and trimmed close to the shape of the 0 12 fretter. That top was glued to the glue blocks using a tiny dot of carpenter’s glue on the top of each little block, being very careful to make sure that the soundhole and center lines of the replacement top were carefully aligned to the original top still on the guitar. As you can see, once the clamps were removed the new top rests about 1/8” above the original, supported all the way around by the glue blocks.
Now it’s time to trim the replacement top. To do this I used a laminate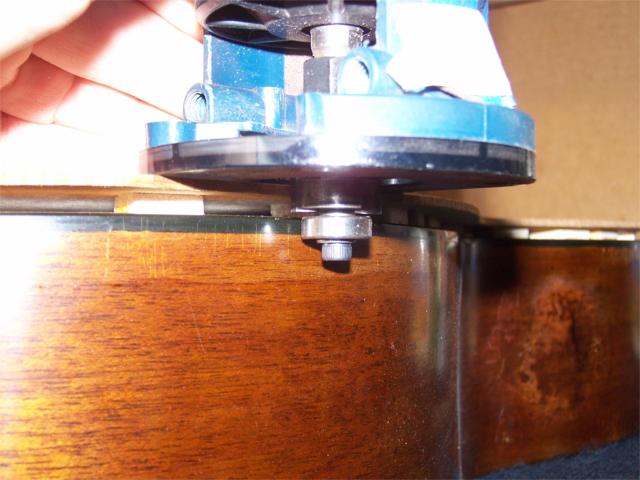 trimmer and a routing bit with a guide bearing that matched the depth of cut necessary to accommodate the original binding and inside purfling line. The router was set so that the bearing of the cutter bit rides on the binding and not the wood. This is important because the bearing, if riding on the wood, will compress the wood slightly and leave a line in the lacquer that will have to be touched up later. However, the binding won’t give much at all (if at all) under the bearing and thus no impression will be left in the lacquer. If everything has been set up properly this arrangement will trim the top
 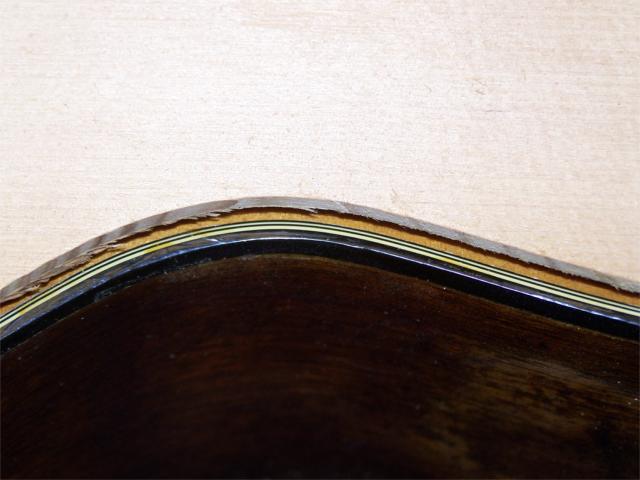 exactly as is needed to conform to the exact profile of the original. This photo shows the top after trimming at the waist of the treble side. While the photo appears to show that the new to is cut too deep that is an illusion created by the camera angle. If viewed from directly above the trim
 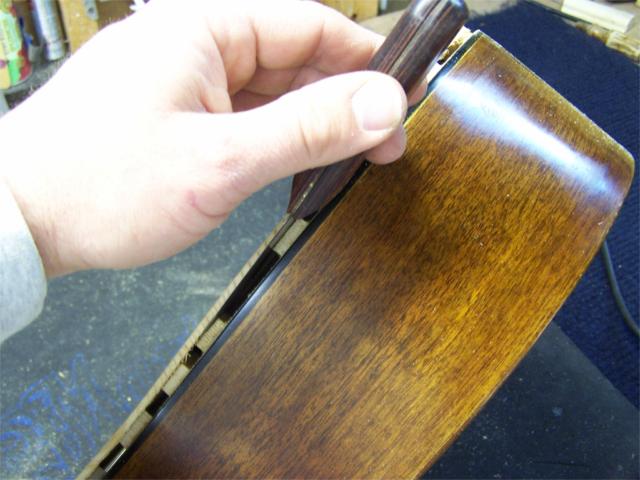 line lines up perfectly with the inside purfling edge. After the trimming was done and I was satisfied with the result the new top was removed from the glue blocks. Since a very small dot of glue was used on each block to secure the new top the bond was easily broken using a thin putty knife inserted between each block and the new top. Everything popped loose easily.
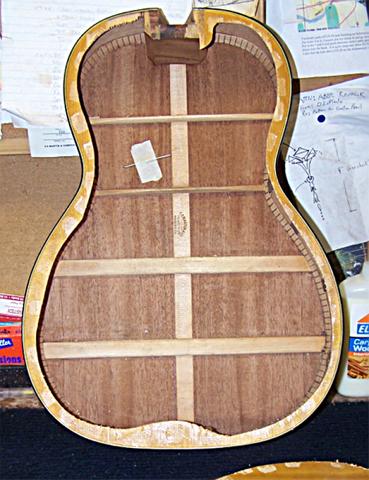 Now that the new top was trimmed to it’s required profile the old top could be removed from the guitar. As the old top did not need to be saved a jig saw was used to cut around top and remove it, taking care to remain well inside the edge of the original kerfed lining inside the guitar. This left a narrow band of the original top still attached to the body. That band of spruce is glued to both the kerfed lining and the purfling and must be removed very carefully.
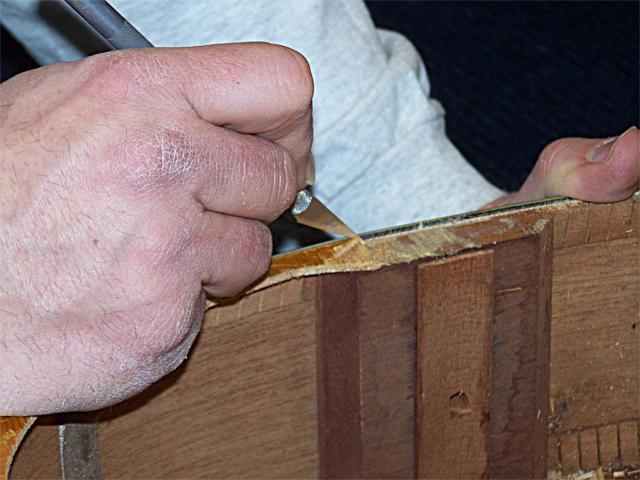
I used a new Exacto blade to slice through the remaining spruce. I worked in small sections along the binding edge with the razor and would subsequently use a chisel to excise the spruce down to the kerfed lining until all of the spruce was removed. After 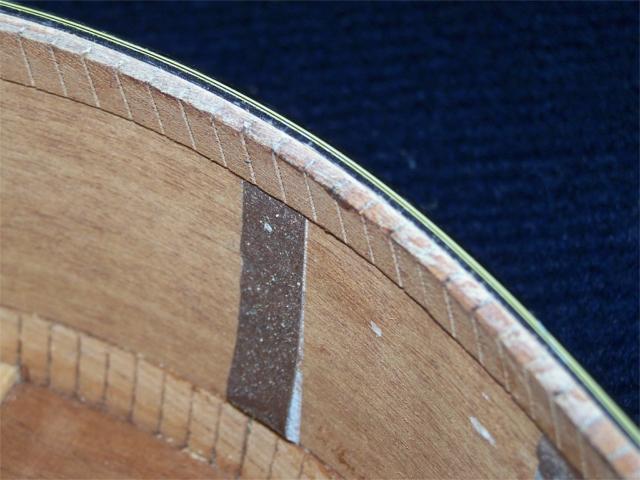
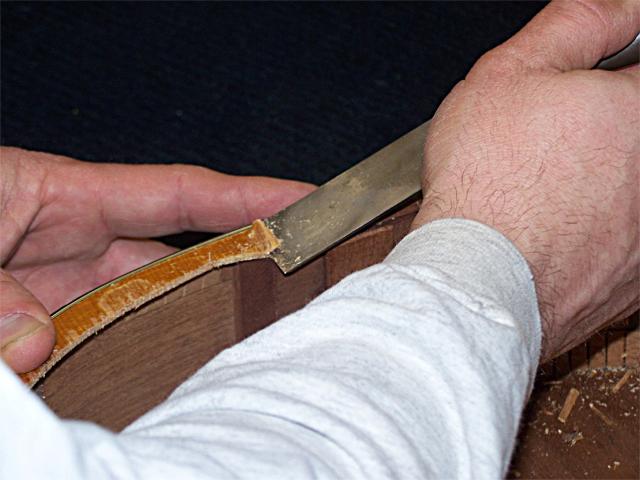 the spruce was gone I went around the entire channel again with the chisel to remove any old remnant of glue or spruce fibers from the lining and inside edge of the purfling to make sure
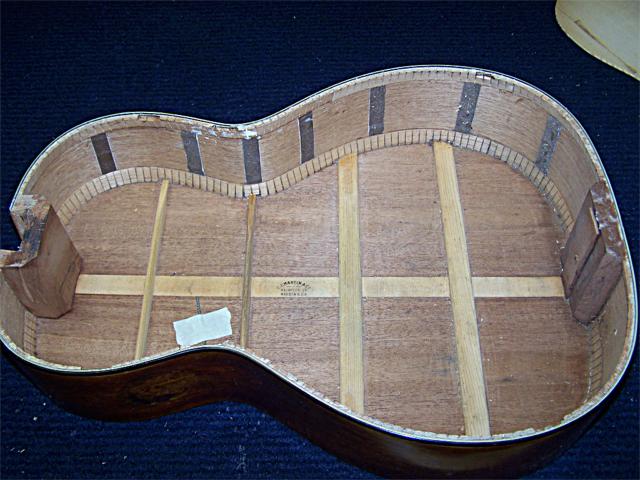 the channel was as clean and level as possible. All of the original spruce now being gone it was possible for the first time to drop the new top (not year braced) into place to check and see if the process was successful. The resultwas perfect in profile withno gaps in the fit and no excessively high spots.Overall the top was a few thousandths of an inch proud allowing for sanding to bring it
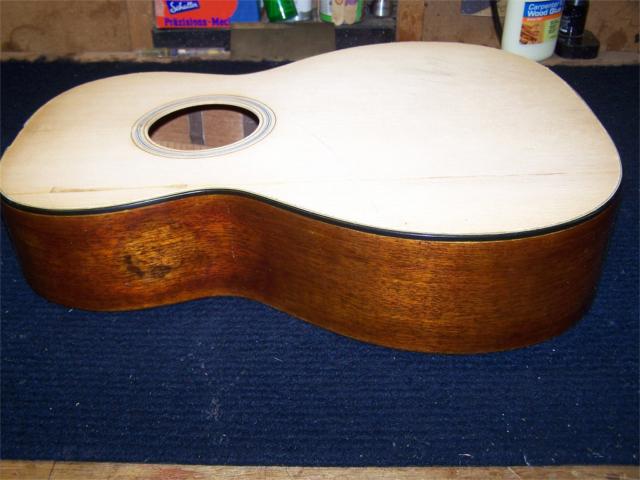 level with the binding and purfling after being glued in place.The next step inthe process was to brace the new top tomatch the original top. Precision is veryimportant in this step as the brace ends are notched in
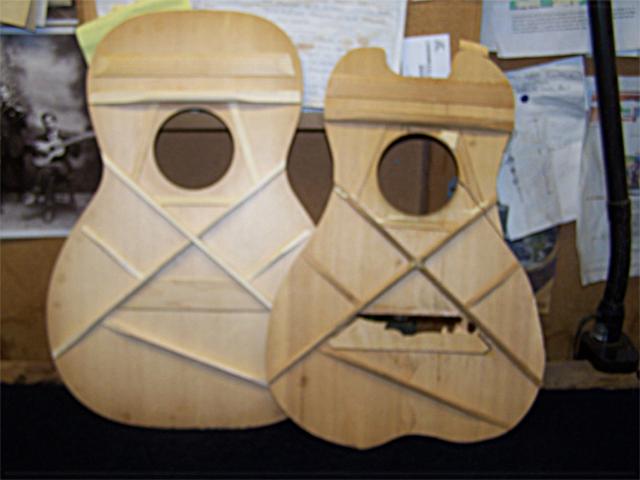 to the kerfed lining. In order to leave the original lining intact with no alteration, the brace locations and heights must perfectly match the original bracing so that the new bracing fits into the factory original kerfing notches for theoriginal bracing. The presence of the original bracing made it easy to match the gauge, shape, and location of each bracing element.
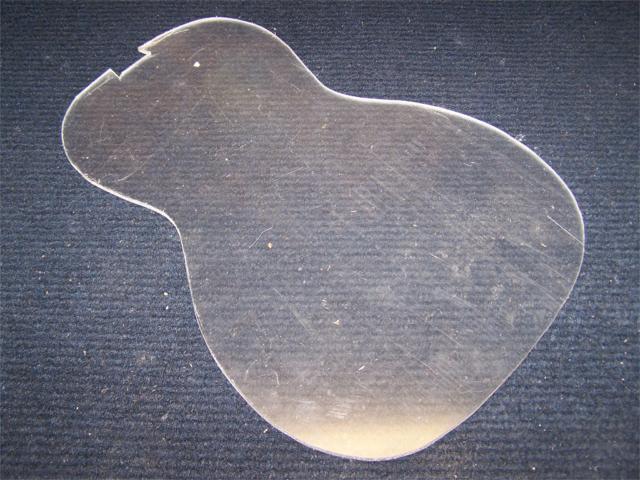 In order to equally distribute the clamping pressure around the new top during installation I cut a single clamping caul to the shape of the new top and just short of the purfling. The caul was made from ¼” thick plexi glass. The plexi is rigid enough to spread the pressure and no glue
 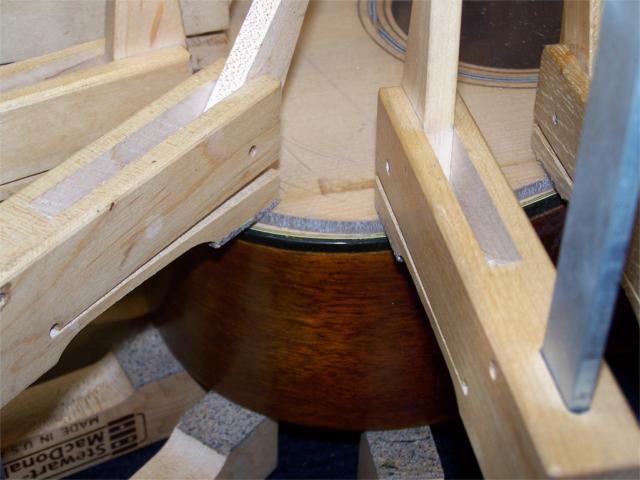 squeeze-out would stick to it so it was a natural choice for the caul. Next, a bead of glue was applied to the kerfed lining and inside of the purfling edge and the new top laid in place. Cam clamps were used around the entire perimeter of the new top and plexi clamping caul, spaced about an inch from one another. As you can see, the caul falls just short of the inside edge of the purfling.
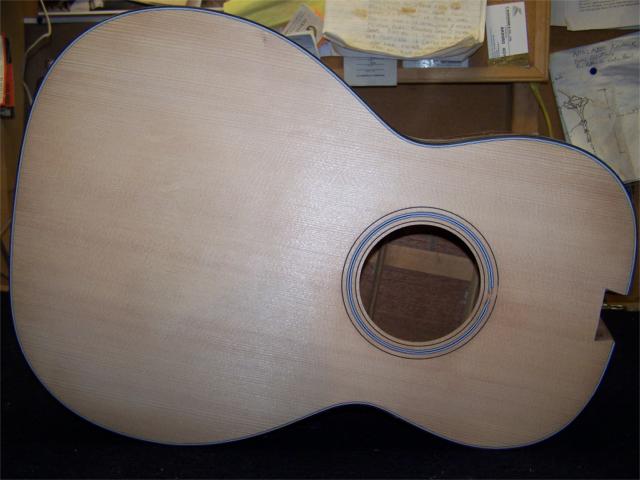 After the glue was dry and the clamps removed the top was sanded in preparation for lacquerfinish. The finished result was very effective, with the joint betweenthe new spruce top
 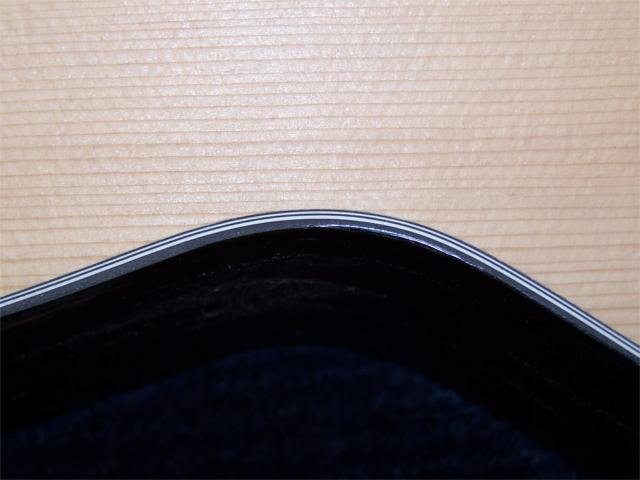 and the purfling being crisp and clean, virtually indistinguishable from the original joint. Though the guitar isshown here prior to the top finish being applied the successful execution of this process sets the stage for a finished job that perfectlyreplicates the look of the original top. The only give away is the inside of the top where I’ve signed my name and dated the work to prevent the guitar being sold as original.
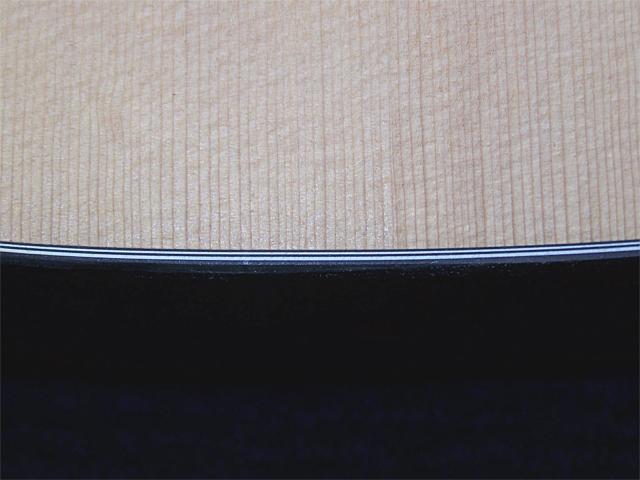
Having done re-top projects both ways now (removing and not removing the original binding) I can say that I much prefer the process that allows the original binding to stay in place. While there may be projects where removal of the binding is desirable (for example, a re-top with a style upgrade to herringbone or pearl) or necessary I see this process as an excellent alternative when original binding is to be retained.
UPDATE:
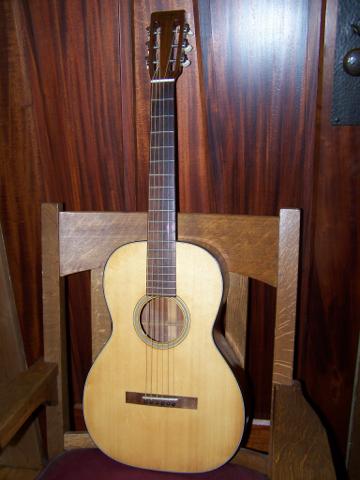 The top finish work on the retopped 0-16 NY is now completed and the guitar back together and ready to go back to it's owner. With the finish complete the guitar looks pretty much exactly as it did when it was new when viewed from the front. Even close inspection reveals no evidence that the original top was lost to damage and replaced.
 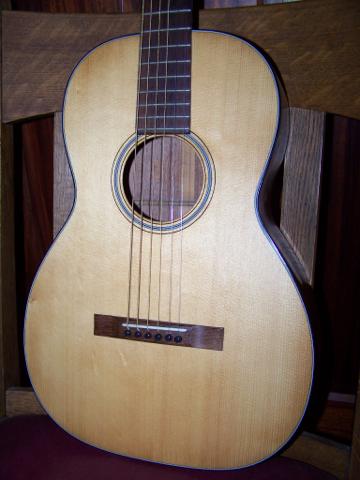 Perhaps the only tell is that the finish on the top looks newer than on the rest of the body, the body showing typical wear and tear from 30 years of play and handling. Of course one could attempt to disguise even that issue by distressing the top finish by adding playwear but I prefer to let the player do that on their own in the course of time. The guitar also retained it's great vintage tone even after the retop, mostly due to the fact that the top that was used was as old as the guitar and well seasoned.